DEVELOPMENT
ONLINE
PROJECTS
|
|
|
|
|
DEVELOPMENT |
ONLINE
PROJECTS |
|||||
| Waxes for Fine Art Encaustic paint needs to contain wax & colour. The quality of these components & the way in which ingredients interact defines the final character & behaviour the paint. |
|
The simplest encaustic paint could be a basic mixture of beeswax and some pigment. However, there are many other types of waxes, each with their own unique heat curve and character. There are also several resins that can be mixed with waxes to alter final working qualities and hardness, melting point and flexibility. Pigments (and dyes) also offer a multitude of qualities. | |||||||||||
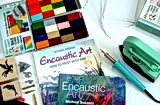
Encaustic Art Wax Blocks
The encaustic Art Wax Blocks come in 48 colours with most of the darker
hues tending to give a thicker & more viscous consistency when molten
( around 65 degrees Celsius). The lighter colours tend to be
more liquid although this is not a strict characteristic. These alternative
viscosities within the range allow for interesting interaction between
the differing waxes. Pleasing and effective combinations are easily discovered.
All colours are totally intermixable. These waxes can be polished when
the artwork is finished or they can be varnished over with the wax sealer
which will keep their sheen (stops blooming of the wax) and also affords
protection from light abrasions e.g. finger marks.
Generally, unless it is necessary , it is better to leave the encaustic art
waxes in a polished state rather than to seal them. This allows future work
to be done and also allows furhter polishing through time. The pure wax surface
is probably far more durable than the acrylic sealer that is often used to
varnish over for greetings card artworks, etc. Classic Recipe Some people prefer to add Carnauba wax (a natural plant leaf product) to the beeswax in place of the damar. This produces a wax that will polish well but is more brittle than the damar formula. Carnauba wax melts at around 80 degrees Celsius and is brittle. It has the effect of helping to raise the melting point of beeswax (around 62 degreesCelsiuss) to a higher level - a desirable improvement for a wax paint medium. Carnauba wax also polishes to a high sheen. Recipes therefore vary, but a combination of bleached (refined) beeswax, damar resin and / or carnauba wax seems to be the most common mix. Some people add micro crystaline waxes as well. These can be obtained at various melt points adn also varying hardness, so the character of a rusultant wax can be natured toward a more specific set of qualities. The process is easiest if some of the beeswax is first melted, usually in a metal container either over a very controlled heat source (hotplate) or a double boiler where the water in the central space avoids overheating past its own boiling point (100C). An open flame is not advisable. Electric cooking rings are able to get very hot, too hot, so again, unless you wish to risk overheating, smoking and even flammable dangers then stay with low heat adn heat limited options. Once the beeswax is molten then the damar resin crystals
can be added, but it is best to make these as small as possible by
crushing first. Colouring options are really to use dry pigment or pigments already in oil (oil paints). The latter will introduce some oil into the final encaustic wax blend, so in pure encaustic this is not something seen as desirable. It is not "wrong" but does seem to defeat the primary idea of using heat as a solvent. Oil will also soften the final wax to some degree, even if that is a very slight affect it is still involving another medium type unecessarily. To blend in the pigment for production a useful volume of wax paint some molten encaustic wax medium needs to be melted in a heated metal container. If the container has a flat bottom then it makes it easier to mill in the dry pigment carefully and a little at a time. For instance, on a hotplate a flat bottomed baking tin can be used to hold the molten wax, then dry pigment that has been milled as fine as possible is added and stirred in. A large flat domestic cooking pallet knife is a good tool to mash the pigment and wax together on the flat bottom of the baking tin, using strokes that press down adn spread sideways, a bit like spreading butter onto bread. This will ensure that al the particles in the pigment get "wetted" and become contacted by the molten wax. The better this process is done then the more even the consistency of your final wax paint. The coloured encaustic wax can then be poured out into molds to cool and be used in the future or it can just be used there and then. Small amounts of any colour can be made by melting some medium on a hotplate adn then working in a little pigment - even by dabbing the waxed brush head into a pot of dry pigment, then coming back to the hotplate and working it into the wax until it reaches the right consistency. Of course a hotplate is an ideal mixing place that keeps
the wax molten adn can also be used to lay your tool on top of so that
they too remain ready warmed for instant use. Wax Emulsion |
||||||||||||
 |
|||||
|
|||||||||||