


DEVELOPMENT
ONLINE
PROJECTS
|
|
|
|
|
DEVELOPMENT |
ONLINE
PROJECTS |
|||||
| Hot Wax Stamping : rubber stamps used in molten wax ... | |
 |
Working stamps directly into the wax is both exciting and rewarding. The images can be interesting and have quite a unique feel to them because they are totally created out of coloured wax. Intricate designs can be made quickly and effectively with very little effort, provided you have chosen the stamp design carefully to suit this method. |
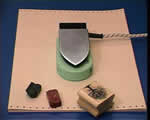 |
Find out how to set up the iron as a mini hotplate |
 |
Remember to put a small piece of tape along the edge to fix the top section to the base. This prevents the top sliding off and minimizes your risk of an accident - please do this. |
 |
Now that the iron hotplate is set up and running at the LOW heat setting you can begin. Choose the stamp you are going to use, then get a piece of card that will become the"palette card". This can be reused numerous times, so it is worth using the proper encaustic art painting card for this. |
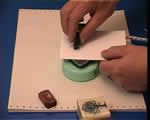 |
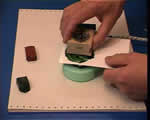
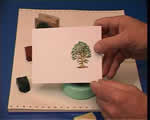
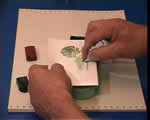
Place the palette card down onto the heated surface of the hotplate and
apply the first coloured wax you want to use - here I am using |
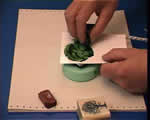 |
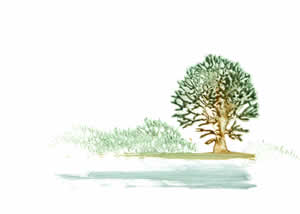
The foliage area is made rather like a big round blob - an even coating of wax over this area. The card is big enough that your free hand can easily hold it without getting too close to the iron hotplate. Warning :just because you can't see the iron doesn't mean that it won't burn you if you are careless enough to touch it! |
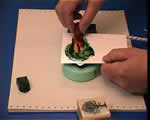 |
Next make the colour in the area of the tree trunk - I have used |
 |
The final palette card looks like a very sad green lollipop on a fat brown stick. |
 |
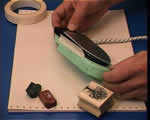
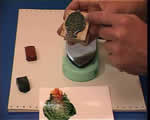
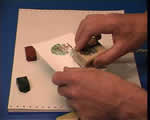
Replace the palette card on the iron hotplate, then rest the stamp into the waxed area for a few seconds, allowing it to warm up. |
 |
"Puddle" the stamp around several times (lift and place, lift and place) until you get a nice even coating of wax colour onto the stamp's surface. |
 |
If your palette card had too much wax on it the stamp will get blotches of saturated areas showing, so check that there is a positive yet not too generous coating on the stamp's surface. Also check that the entire surface does have wax on it - nothing worse than printing the stamp only to discover part of it does not transfer wax colour because it was poorly loaded. |
 |
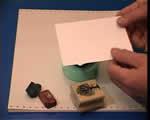
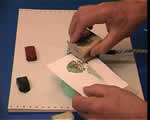
Now remove the palette card and get a fresh piece upon which you want to print the waxed stamp. Place the fresh card onto the heated iron hotplate surface, and prepare to make the print. |
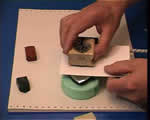 |
Carefully hover just above the card until you have positioned the stamp exactly where you want to have the image. Then precisely place the stamp down onto the card in one clean movement and hold it there for about 5 seconds, pressing firmly, but not hard enough to slip or slide about on the card. |
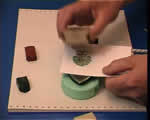 |
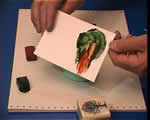
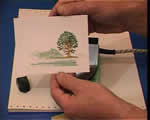
Lift off cleanly and you will find the wax stamped out onto the card. Remove the card from the heated surface of the iron hotplate and allow a few seconds for it to cool and solidify. |
 |
The stamped wax image will reflect the colours as you placed them on the original palette card, and this is the time to check how well you loaded the stamp with wax - if the image is blotchy and over waxed then next time use a bit less, on the other hand, if the image is a bit weak and under coloured then next time use a bit more wax. |
 |
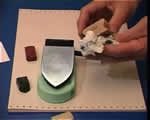
You can add interest to the foreground by just pressing the edge of the tree stamp into the card, level with the foot of the tree or just a little higher - remember to rest the card back on the heated iron surface so that the wax can melt off the stamp's edge. |
 |
Do this across the whole of the card to create a "ground level" |
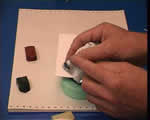 |
For an interesting and easy water effect get a piece of tissue with a little dirty wax already on it, and form it into a small edge which your finger can fit behind easily. |
 |
Rest the card onto the iron hotplate and then smear the tissue across the lower edge of the latest stamp edged effects. This must be done parallel to the bottom of the card if the illusion of water is to be maintained. |
 |
So it is done - and simple enough at that! This technique of using stamps with hot wax can offer some very creative ideas and has much to offer - just look out for stamps that will work well in this way. ...but don't forget to clean the stamp |
 |
... here's the next page you will need How to clean the Rubber Stamp after Hot Wax Stamping |
| GO TO |
|