


DEVELOPMENT
ONLINE
PROJECTS
|
|
|
|
|
DEVELOPMENT |
ONLINE
PROJECTS |
|||||
| Show Demo - an overview of simple iron & wax techniques | |
   |
This step by step demonstration will explain everything that you need to get started with encaustic art |
 |
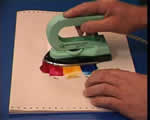
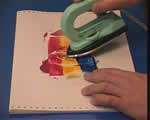
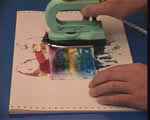
Test the iron's heat - set it to LOW (= nylon) Use the No.8 Bluegreen wax colour to test the iron's correct temperature. This colour should run slowly down the face of the iron, eventually about half way. If it runs fast the iron is too hot so turn it down and try again a couple of minutes |
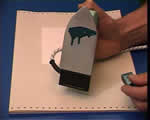 |
This is how it should look, but not like the yellow in the next picture. It is vital to use the No.8 Bluegreen Wax Block colour (in this range) because it has a strong and viscous body so it is the ideal testing colour - same colour as the iron pretty much! What about CLEANING THE IRON? |
 |
Different Colours have varying liquidity Darker colours are generally thicker than the lighter ones so
watch and try to learn about the different qualities of each colour. Thinner
ones are runnier. |
 |
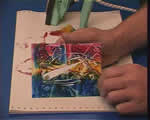
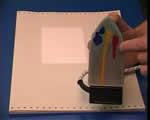
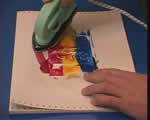
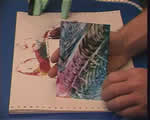
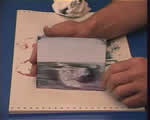
Loading the Iron for the First Abstract Experiment
|
 |
Once the iron is fully loaded (that is enough for one A6 card (about postcard size) you are ready to work it onto the painting card, so make sure that you have one ready in place on top of some disposable scrap paper. |
 |
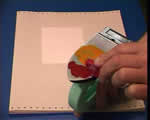
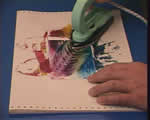
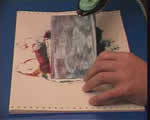
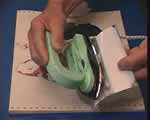
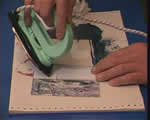
Smoothing If you are right handed then place the waxed surface of the iron over the left section of the card, so that the wax colour is deposited onto the card (not the disposable paper). Then gently smooth along the card without pressing - almost floating the iron over the liquid wax - remember, you are trying to leave a clean coating of wax on the card. |
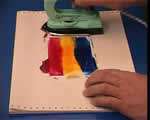 |
Smooth the iron right the way off the final edge of the card. Slow speed and a light touch yield fairly smooth results whilst a faster action will create texture. If there are any gaps just go over it all again without adding any more wax, however, if it looks scratchy and dirty then it is time to add more wax and build up the layer. |
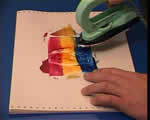 |
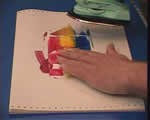
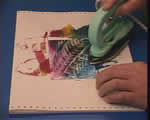
Lifting Place the iron down over the middle of the waxed card then after a second or two to melt the underlying wax lift it directly upward and off the card. The resulting "suction effect" is one of the key iron markings later used in landscape and adds fascination and detail to any abstract work too. up to top |
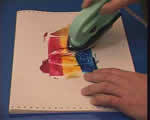 |
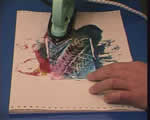
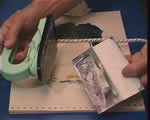
Edge Turn the iron handle in towards your non-working hand, so that it is at a 45degree angle and the rounded iron's edge rests on the waxed card. Now, like an ice-skate cut through the surface of the wax colours. The hot edge will remelt any wax it meets and leave a line behind. Ice skates make thin lines but snow ploughs push sideways and make thick paths. |
 |
Point The point is the finest part of the iron's shape and is therefor the best bit to use for adding finest details and thinnest lines. Just tip the iron forward so it rests lightly on the tip of the iron, then move it around as you wish. Try some scribbles at first. up to top |
 |
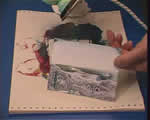
Absorbency of paper
compared to Encaustic Art Card Notice that the wax can be moved around on the surface of the card and removed if required. But look at the absorbent disposable paper and you will see that it becomes saturated by the passage of wax over it. You should use the sealed painting card if you want to be able to reworked and change anything - my advice is use it! |
 |
Instantly cool (but never technically dry!) |
 |
...but always reworkable on the sealed encaustic card |
 |
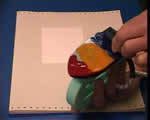
...make some interesting "mess" Anyway, carry on playing around until your mess is at some point a "pleasing mess" - then instantly stop - that's it.... |
|
This could be the final artwork,
or.... |
 |
Remelt the abstract image once again and continue... |
 |
Wriggle Patterning |
 |
Rattle Patterning The rattle is much harder to explain because you have to rock the iron using the point as a fulcrum and allowing it all to happen in a loose and wild manner. It is easier to see live (like on the video) up to top |
 |
Shuffle Patterning |
 |
...you could now stop here |
|
If you choose to stop here then it is time to polish the wax artwork and decide what it's purpose will be - greetings card, home decor or gallery artwork?
|
 |
..or carry on - but what if you
overmix the colours? No problem! It happens to us all - like a bad hair day - too much stirring around, wrong colour choices or whatever! So what to do about it? Well you can always remove the offending wax... |
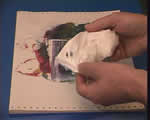 |
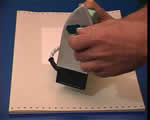
Tissue wiping pad ready to remove the heated wax Prepare it into a pad that is comfortable in your hand, then pass the iron over the waxed card a couple of times slowly, so that the wax remelts and stays warm. Then.... |
 |
Pick up the tissue pad and gently but firmly wipe the dirty wax off.
If you do the top third to half of your card you can create a simple but
effective landscape from the remnants of the dirty card.... |
 |
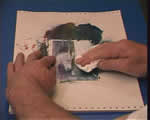
Half clean half dirty = sky and land
|
 |
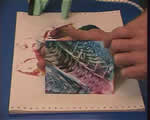
Lift & dab for foliage texture (suction effect) |
 |
This is a big technical step forward from constant iron or "arc" marks all over the place, and adds to the natural appearance of the foreground significantly - it is worth persevering with this particular technique. |
 |
The resulting 3 band landscape now consists of a wiped sky, which also left the horizon line shape, and then a foreground that includes the texturing created by the lifting "suction" effect. |
 |
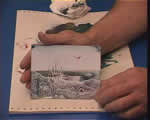
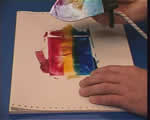
Edge of the iron for grasses (thin lines) |
 |
Tip of
the iron for finest iron details (bird) To finish off this simple introductory exercise just dip the tip of the iron into a block of wax - try a mix of one dip into the No.23 Olive green and another quick one into No.14 Yellow brown. This mixes into a dark brown and is nice a fluid to flow off the iron's tip easily. So first make a spot, then flick it outwards with the now cleaned tip to form wings - rather like clock hands at 12 minutes to 3 |
|
...maybe it's time to take a rest here now! So now you've begun please carry on & develop your unique creativity through practice & change - experiment & discovery |
| GO TO |
|