


DEVELOPMENT
ONLINE
PROJECTS
|
|
|
|
|
DEVELOPMENT |
ONLINE
PROJECTS |
|||||
| Assembling the iron for normal encaustic art usage ... | |
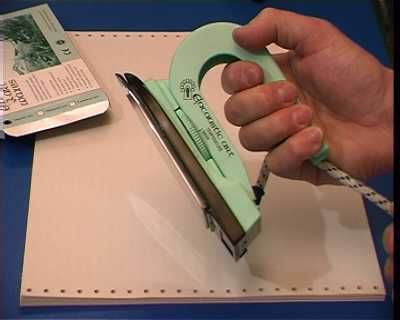 |
The encaustic art painting iron is designed to store in a neatly packed form. This is how it will arrive when you unpack it from the box. The iron can be operated in several ways:
|
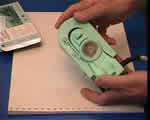 |
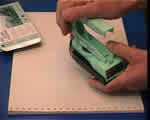
To assemble the iron first remove all packaging. Grip the handle in one hand and the iron's body in the other ... |
 |
... then gently slide the two pieces apart. |
 |
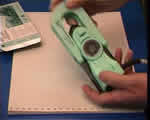
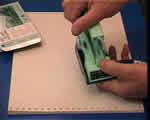
Locate the spigot at the front top end of the iron's body section and fit the accomodating hole on the lower curved part of the handle, so that they locate together and form a firm grip. |
 |
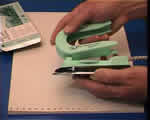
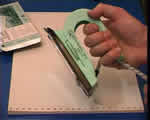
Snap the rear end of the handle down into the iron's body. The moveable sprung button catch should now overlap the handle so that it is securely fixed. |
 |
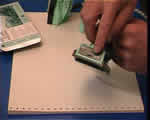
Check that the handle can not be pulled off the iron's base by giving it a firm tug. If it comes loose then the button was not properly engaged - try again. When it stay in place the handle is fixed in position correctly. |
 |
Now the iron is ready for use. For a good grip take this |
 |
NOTE: All irons are now made to suit local voltage. A Dual Voltage Switch can be found on very old models at the rear end of the iron's body. This does not apply to current production. |
| GO TO |
|