DEVELOPMENT
ONLINE
PROJECTS
|
|
|
|
|
DEVELOPMENT |
ONLINE
PROJECTS |
|||||
Hotplate : John Buckland in Exploring Ideas |
|||
John Buckland |
 |
 |
 |
 |
 |
 |
|
 |
 |
 |
 |
DISABLE POP-UP BLOCKING
THEN CLICK ANY IMAGE TO SEE IT LARGER |
|||
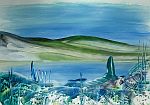
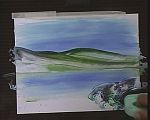
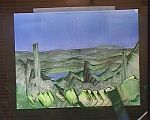
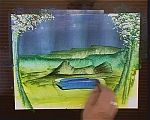
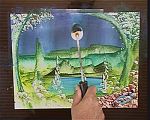
| Basic approach to landscape | |
|
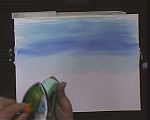
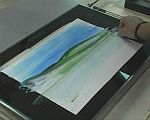
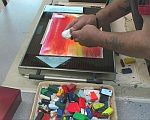
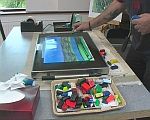
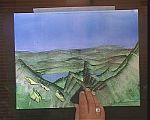
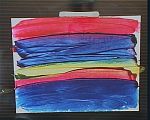
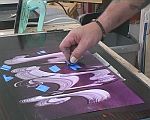
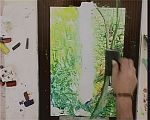
John Buckland created a great Hotplate section
on the DVD program called: "Encaustic
Art ~ Exploring Ideas" This first simple example demonstrates a basic approach to hotplate landscape. All images on this page are shown live on the DVD. |
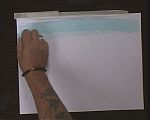 |
A3 encaustic art painting card is used for all the work on this page. A card is first taped into place. The the application of the wax colour can begin. Here a pastel blue (no.31) is applied as the base wax colour. It is simply drawn over the heated card which causes it to melt off onto the white surface into a molten paint. |
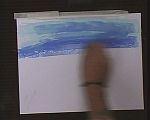 |
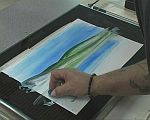
Some darker blue is now added ... |
 |
... then worked over again with the pastel blue to tone it in. |
 |
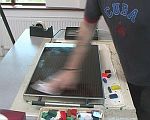
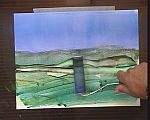
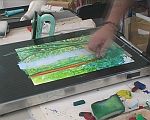
Once the sky has been finished the iron is chosen as the means to introduce a horizon. This will create a hard dividing line between sky and land. Strange as it may seem, using the iron on top of the heated plate is a valuable tool. |
 |
The iron is placed gently down onto the surface and then smoothed across, back and forth, to create a pleasing collection of marks that define the hills and horizon. |
 |
This horizon spans edge to edge. |
 |
Next a tissue is used to clean up the lower edge a little, before further wax is added. |
 |
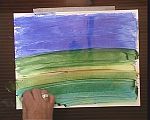
Back to the pastel blue, reflecting the light hue of the sky colours. this is drawn right across the work piece, leaving its molten trail of colour. |
 |
A touch of the darker hue will enhance the tonal quality of the colours. |
 |
Again, this is blended in, either with further lighter wax or a tissue. The wax approach for blending yields a more fluid result, so is often a better choice of approach. |
 |
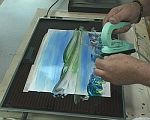
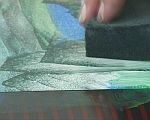
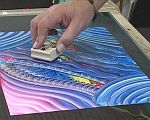
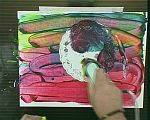
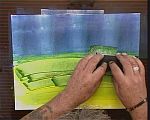
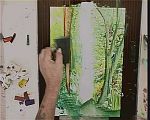
Now, in preparation for the foreground, John is loading the iron with some stronger colours. |
 |
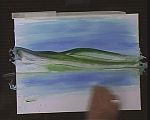
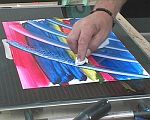
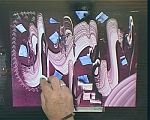
These are dabbed into place with the card still sitting flat on top of the hotplate. One disadvantage of this particular method is that "arc marks" can be formed by the curved edge of the iron as it sits flat on the hotplate. These "arc marks" are very visible in this image and the following ones. |
 |
But forgiving that potential issue, this is a fast and easy way to get textural colour into place. In fact, for a surrealist landscape the curved markings actually add a point of interest. |
 |
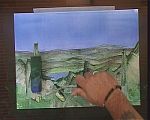
Wax is melted onto the tip of the iron ... |
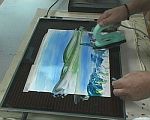 |
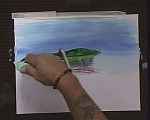
... then applied to create a feature of stand stone. |
 |
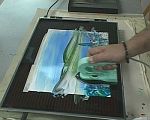
further additional marks are added with the iron's edge ... |
 top index |
... until the image is completed. |
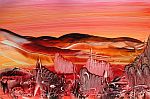
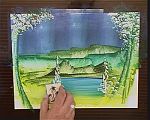
| More landscape in a Fantasy theme | |
|
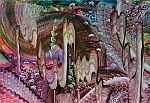
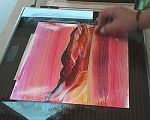
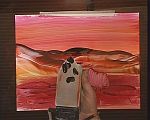
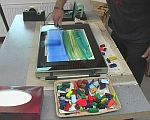
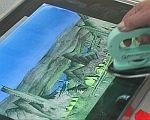
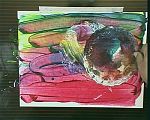
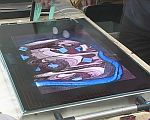
So onto another landscape, this time coloured for a fantasy feel and with foreground details that are more abstract than reproductions of actual "things". |
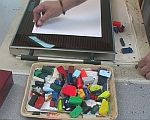 |
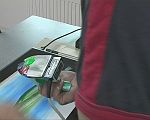
The encaustic art wax blocks are all jumbled in a handy & convenient tray next to the hotplate itself. This makes it easy to collect new colours as others are released back into the collection. |
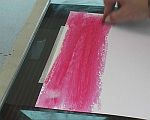 |
Again, the sky area is first to be worked with wax colour being melted on directly from the encaustic block. |
 |
Some of the more luminous "vivid" colours, like this neon orange (No.38) are included in the mixture to give vitality & a "kick" to the light within the image. |
 |
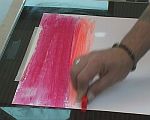
As the lighter colours overlay the darker ones a brightness builds. |
 |
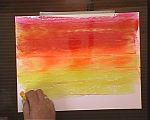
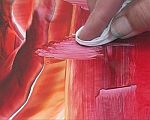
This can then be blended, muted & harmonized by wiping through with a soft tissue pad ... |
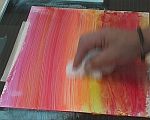 |
... until a pleasing sky effect is achieved. |
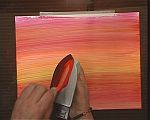 |
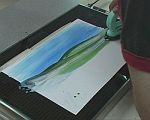
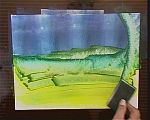
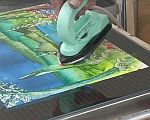
The iron is loaded with some stronger but harmonious coloured wax ... |
 |
... then the metal surface of the iron is rested gently onto card that sits on the flat glass hotplate. A horizon shape is formed & a commitment is entered into. |
 |
More wax is added as necessary ... |
 |
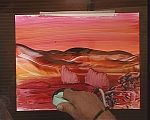
... then when the iron's work is done a tissue pad is again used to define a horizontal line for the bottom of the hills & at the same time the far edge of a plain or perhaps a lake? |
 |
Further colour is added to this new flat zone ... |
 |
... which is toned in with more tissue rubbed softly across. |
 |
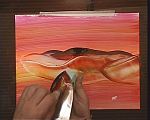
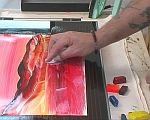
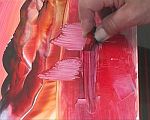
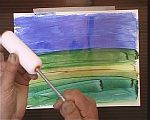
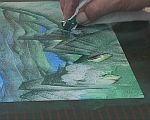
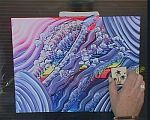
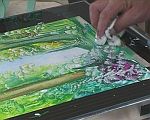
Now John has wrapped a piece of tissue around his finger tip and started working in small upward push movements, teasing the wax into new forms, new shapes, new interest in the foreground. |
 |
The wax blocks are used directly as well, adding and developing, covering ragged edges and increasing intensity of colour. |
 |
time for a bit or darker colour onto the iron ... |
 |
... then some dabbed textural work. |
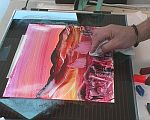 |
More tissue moving ... |
 |
... more iron tip detailing ... |
 top index |
... some cross hatching, then it is time to say enough is enough and let the piece rest, complete and satisfied. |
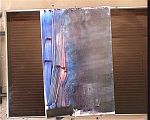
| Rolled & sponged landscape | |
|
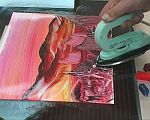
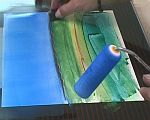
Back to natural colours for this one, where a roller will be used in most of the landscape image creation. |
 |
But first, a quick wipe down with some tissue to remove the traces of red from the last piece of work. For greater cleanliness just melt on some clear wax, the wipe this over and off the hotplate glass surface until no further dirt shows on a clean tissue pad. |
 |
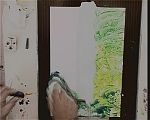
Crayon on wax colour to get started ... |
 |
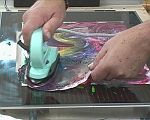
... then take a roller, here a nice new one! * This is a sponge head on a decorator's roller, often sold to be used for painting radiators and similar smaller areas, like the inside of window reveals, etc. Most good hardware or DIY places sell sets of these, with replacement heads available separately too, which is just as well! |
 |
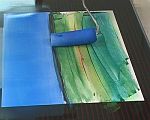
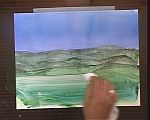
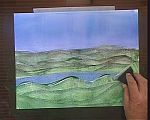
The roller is initially used just in the sky area, and because it is new the blue stays perfectly blue. |
 |
Roll evenly and fairly lightly, back and forth, across the entire width of the sky area. |
 |
Some darker wax is now drawn along the dividing horizon line to strengthen the divide. |
 |
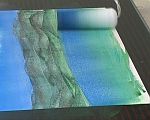
Then the roller is used with the outer end pressed down hard (by tilting the handle end up at an angle). This forces a line to form at the end of the rollers path ... |
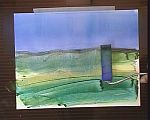 |
.. which forms the distant faded horizon. |
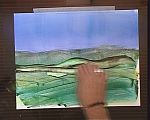 |
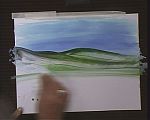
More wax is added to again strengthen the main body of the landscape ... |
 |
... then the roller is used to blend this into more layers of hill and horizon. Note that the roller is now no longer pure blue. It has picked up the greenish tone and so will not be suitable for another sky. It is best to reserve one roller head for each particular colour if you are intending to do lots of roller work, otherwise you will have to buy lots! |
 |
Tissue is used to delineate and clean the area between distant land mass and the far side of the intended lake. |
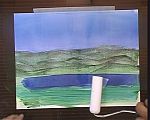 |
Blue is crayoned into this cleaned area, then another new roller is used to blend the blue wax into a lake / water form. |
 |
Gently even strokes reward the user with a soft smooth surface. |
 |
Now some green wax is added into the lower area of the card, making the basis for foreground detail. |
 |
The form of the wax is taken up at one side to break the monotony of even horizontal bands. |
 |
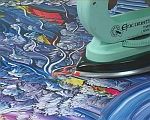
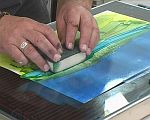
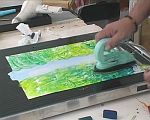
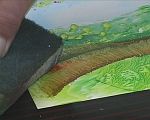
A square edged sponge (this one is a house-hold type) is now used to push the existing wax colour around, creating hard edges that show good definition. |
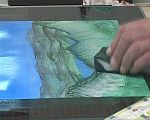 |
This type of sponge approach is very satisfying for edge creation. |
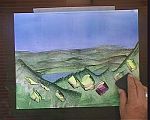 |
More colours are introduced. These will tone down into the existing wax colour as they are worked over, but the tones will vary slightly due to the various hues now incorporated. |
 |
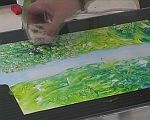
There is no limit on imagination, so John, who has plenty of imaginative power, takes the forms into an echoing dance of right angled edge marks. |
 |
These are a natural result of the sponge corner being used ... |
 |
... but tissue can also have its part to play. This randomly shaped finger of tissue will impart its own subtle textures each time it contacts the wax. |
 |
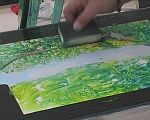
The roller can suddenly be found useful as a straight line making tool. No rolling is involved, just place and lift. |
 |
A bit more colour to alter the foreground tone once again, then roll it in so that a nice blending occurs. |
 top index |
And with a few more touches of the iron's metal tip, adding some small details of interest, the piece is completed. |
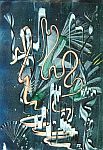
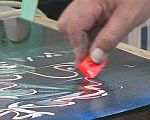
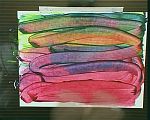
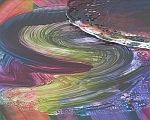
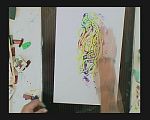
| Fantasy abstract approaches - lines dancing | |
|
Here is a quick song in wax. It feels like a musical dance. It is about spontaneity and pleasure. It is about the freedom to play - no rights or wrongs. |
 |
As in the former works, start by crayoning on colour that melts as the encaustic blocks contact the card. |
 |
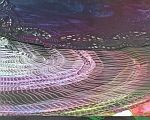
Then place the roller to create one of those straight marks, but this time lift it at the outer end and pirouette the sponge head clockwise until it has traveled sufficiently that when it is replaced on the waxed card the new mark is distinct from the original one. These "fan" marks are an interesting effect. |
 |
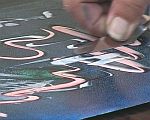
John uses a metal palette knife just like any other painter might if they were creating abstract stokes freely. Explore this tool as it can be very useful and diverse too. - |
 |
Of course, using a contrasting wax block colour will create an instant and strong new feature in the piece. |
 top index |
Working the palette knife in a closer manner, like a long metal edge, can create another set of interesting and useful markings. Ever experimental, John continues to explore in every artwork he begins. It is valuable to understand that there are no fixed absolutes of right or wrong in the creative world of encaustic hotplate art. |
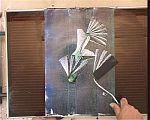
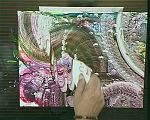
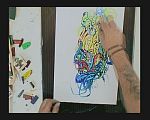
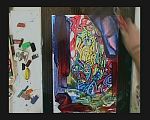
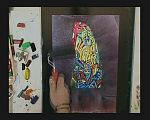
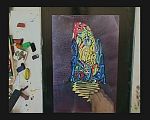
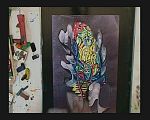
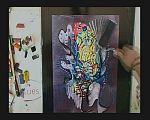
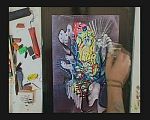
| Rubber Stamping abstract approaches | |
|
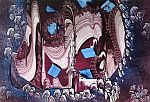
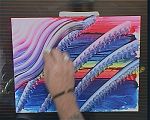
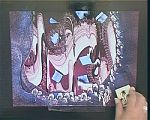
Rubber stamps can seem to be very limited in their potential. Well, that is until you experience using them on a hotplate with the encaustic process. John shows just that expression in this lovely piece of artwork. Remember, click any image to see it in a pop-up window. |
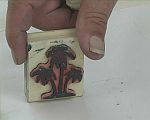 |
This is a palm tree stamp. The image area is made from rubber through a vulcanization process, so the heat of the hotplate is no problem at all. All sorts of rubber stamps are usable and every different design offer a different edge shape to explore with. |
 |
As previously, begin the artwork by melting on the desired colours of encaustic wax, covering the whole card surface as you choose. |
 |
Straight away John has decided to use a piece of tissue wrapped around his finger tip as the initial tool. A series of arced bands are wiped down through the molten wax. Then they are all dabbed over, again using the finger tissue, but this time hopping on and off in small even steps along the line. An attractive trail of marks is created. |
 |
One of the corner areas is finger tissue wiped again, this time with a whole set of curvy lines. |
 |
Another approach in this corner - a series of arced lines all overlapping. |
 |
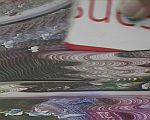
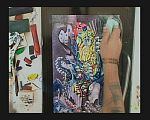
The rubber stamp is brought into contact with the wax colour and the lead edge is simply pressed on and off with the location of the contact point changing between each application. In other words, the stamp is held at an angle so that only the edge contacts the wax and it is touched on and off whilst hopping along to differing places for each touch. |
 |
The resultant markings are now very clear. |
 |
The iron tip is chosen next and used to form wavy lines. |
 |
Some tissue is used to rub out an area, perhaps a set of steps? |
 top index |
The iron adds in some long thin lines and the piece is finished. Take another look at the first image in this set which is the result of this approach. The amount of detail and interest is really quite amazing. |
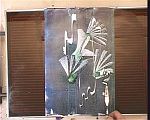
| Doilie and torn card abstract approaches | |
|
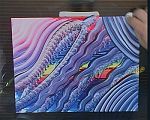
Sometimes the most common bits and pieces can prove to create some of the best effects. Just look at the result of this example. |
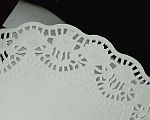 |
A doilie is used underneath some types of cake to act as a pretty decoration for the plate that the cake sits upon. They are made from paper and have very pierced lacy decoration around their edges, sometimes floral too. |
 |
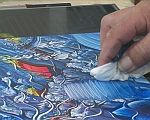
Start in the familiar manner by covering the card with molten wax colour, straight from the wax block that you hold in your hand and draw onto the card. |
 |
Load some wax onto the iron then wipe this onto an area of the doilie. |
 |
Next, press the doilie down with the iron to create a good contact between it and the underlying waxed card. |
 |
Once this is done you are ready to begin gently puling the doilie ... |
 |
... to leave a trail of effects in the wax. Unfortunately this first go lacked quite enough wax to create a good adhesion between the doilie and card. |
 |
The resulting snaking trail was not as positive as it could be ... |
 |
... so John lifted off the doilie ... |
 |
... re-waxed it and then pressed it into contact with the underlying wax colour once more. |
 |
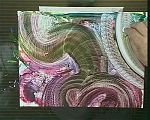
This time there was sufficient wax colour beneath the doilie to create the necessary suction effect that hold tension when the paper doilie is pulled. The liquid wax is left in fascinating and complex detail as the paper doilie is juddered along, as if held by a very shaky hand. |
 |
Some finger tissue rubbing and dabbing adds more pattern ... |
 |
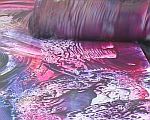
... and a torn card weaves in some flowing fluid shapes. The wax passes through the fine serrations of the card's edge, creating a wonderful combed set of ridges, a bit like a ploughed field might be from an overhead aeroplane. |
 top index |
These marks all combine to form a lovely busy scheme. Check the original artwork at the start of this particular section to appreciate it once more. |
| Torn card abstract | |
|
Now that you have had a peek at the torn card let's look a little closer at this most simple yet wonderfully productive tool. |
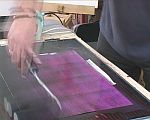 |
First roll on a coating of wax colour so that there is something for the torn card to work into. |
 |
This is half of the piece of card that was popped out of the tissue box lid. Therefore its edges contain regular fine serrations, manufactured to make it easy to open the tissue box! It might seem a bizarre thing to use, but just look at how John makes it dance. |
 |
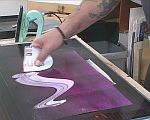
This first waving weaving stroke is in itself a lovely form. |
 |
Add another one traversing the first and the complexity is already astounding. |
 |
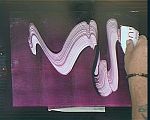
A quick addition of some wide blue square marks straight from the blue encaustic art block ... |
 |
... and another dimension is introduced. |
 |
Crayon in some more blue as a surround, then take a roller and work this up into a smooth wide irregular border ... |
 top index |
... then finish off with a few stamp marks and patterns. Another abstract journey that created an immensely interesting and unusual piece of artwork. |
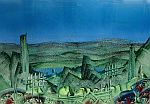
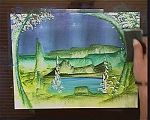
| Sponge Landscape | |
|
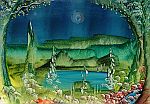
Landscape has often been the subject by which those who believe they can not paint judge those whom they believe can. This lovely moonlit scene is beautiful to watch being created. See it live on the DVD for the full effect! |
 |
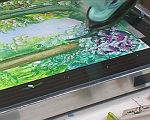
A familiar starting point is to have covered the card with the appropriate encaustic waxes. Now John is using the regular household sponge as a tool for pushing the wax into more concentrated lines; horizons. |
 |
The sponge is loosely but securely held and it is just the top edge, nearest us in this photo, that is actually doing the work of moving wax. |
 |
Similarly, it can be used to edge wax colour in a new enclosing form. The sponge is being used here with just the right hand holding it. It helps to be a little bit ambidextrous when working with encaustic art! |
 |
Next,the stamp is back in John's hand, adding its dance of marks and foliage patterns. |
 |
A quick wipe with tissue clears out an area, then blue wax is melted in there, ready for some more development. |
 |
A tissue has smeared the blue wax into a softened shade. Now the stamp is being employed to form upright plant structures. |
 |
Again, the sponge makes a tall upright form. Notice how John jumps from one tool to another, then back again, all the time monitoring the progress, reacting to what has happened and finding where to work into the image next. This constant feeling for the flow of direction is a valuable creative methodology. |
 |
More detail to the tree form on the right border. A tighter more solid curve is added. |
 |
Some colour is waxed into the bottom right, then textured with the stamp again. |
 |
The roller is used to make the disk shape in the sky, here to represent a moon. |
 |
Some final definition with the iron tip, then it is completed. Don't forget to look at the final version of this image again. |
 top index |
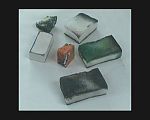
Here are some of the sponges used by John during creation of the images on this whole page. |
| Waterfall woodlands | |
|
Waterfalls and trees are popular subjects, so this image is one to relish. Again, John Buckland performs this piece live on the DVD Exploring Ideas and uses sponges and the stamp to excellent result. |
 |
The iron has been used this tie, quickly laying in the first half of the card's surface with mottled colour. |
 |
The other side is now added, mirroring the first. |
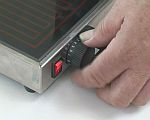 |
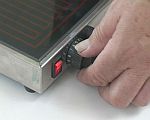
The temperature of the hotplate is adjusted through out all work periods. For more liquidity the temperature can be nudged higher. For holding firmer detail and textured areas the temperature can be reduced a little. |
 |
The palm stamp is used to input texture for the foliage area. |
 |
Some extra colour is added on the right hand side, then merged and softened with tissue rubbing. |
 |
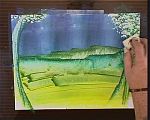
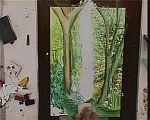
A sponge is used to edge in the initial tree trunk skeleton ... |
 |
... that now sits in front of the original yellow green foliage wax. |
 |
A dark brown streak is added on the other side to illustrate another approach to tree trunks. |
 |
This is now tempered down with the edge of the sponge, refining the shape and defining the edges more carefully. |
 |
Again, some temperature adjustment was felt necessary. |
 |
The sponge edge gives a super clean line and is used here to impose a second trunk curve. |
 |
The image is taking shape now, so John puts attention to the ground foliage. |
 |
Adding colour from the blocks of wax, then dabbing with the stamp, before working in with the iron to form a stronger feature of a stone or similar. |
 top index |
Some final tissue dabbing to harmonize and blend the whole bottom foreground, then it is done. Another amazing production that is worth a close look again!. |
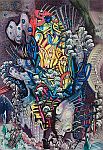
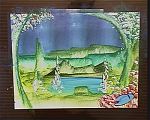
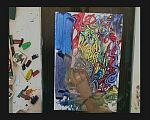
| Pandora's box | |
|
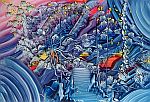
... and finally, a real pandora's box of busy, energetic, bursting visual action. |
 |
It starts out as a set of scribbled lines, the wax blocks easily melting onto the heated card surface. |
 |
More and more are added, until the page is screaming with colourful lines. |
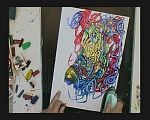 |
So why not try the iron then thinks John? |
 |
Some more hectic melted crayoning ... |
 |
... leads to the roller being grabbed, ready to eliminate some of that business ... |
 |
... with a few deft strokes. |
 |
But no, it is too dull and contained now, so time to add a nice yellow flowing line form ... |
 |
... some wavy torn card edgings ... |
 |
...a bit more rollering ... |
 |
... the stamp, of course, don't forget the stamp effects ... |
 |
... a bit of tissue rub and pattern dabbing too ... |
 top index |
... it just races along as if Pandora's box really has been opened! But with a final iron flurry John completes this magical explosion of delights. Thank you so much John Buckland for sharing your wonderful creative talents and enjoyment with all of us under the pressure of glaring cameras and time limits to boot. A great open-hearted help. |
| GO TO |
|