 |
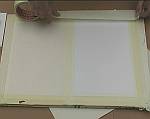
In this demonstration the under-board is
a foam core board that is light & rigid. The A3 card is taped carefully
to the surface, ensuring a neat overlap on each edge. When the tape is
later removed this will remain white, so take care to create a pleasing
border overlap.
Masking tape is a low tack disposable & economic product for this. |
 |
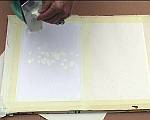
Clear wax is first applied over the entire area that
will become coated during the blowing process. The iron makes it easy to
cover the whole area. AVOID ANY HOLES in this under-coat of clear
wax because
this is what enables the colours to flow readily into every part of the
surface. You may need to turn the iron up to a medium heat to cover
larger areas smoothly. |
 |
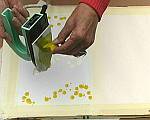
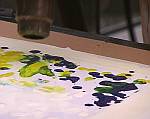
A fast way to get the wax colour in the right areas without
merging other applied colours into it is to use the iron in a vertical
position & let the wax dribble off onto the prepared surface. In this piece
the lightest colours are kept in the center; white is first on. Later,
during the blowing it is best to move the lighter colours out over the
darker ones as this will create a stronger impression of light in the image. |
 |
Further colours are added in a similar manner, working largely
in a concentric pattern, so that the light is in the middle surrounded
or framed by the darker hues. It is often not necessary to clean the iron
since the colours being used are going to merge during blowing anyway. |
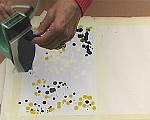 |
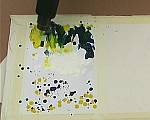
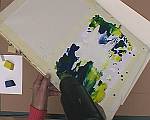
Finally add the last colour, here it is dark blue. Allow
a few seconds after breaking contact between the wax block & the iron's
surface, so that the remaining molten colour can dribble off and not be
wasted on the cleaning tissue. Notice the proximity of the blobs of wax.
This amount of wax is about what is needed to ensure the molten colour
is fluid enough to blow and move during the heated stage. |
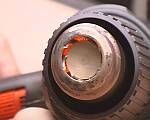 |
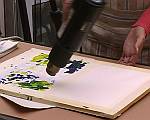
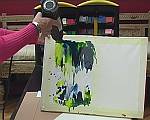
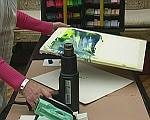
Time to switch on the hot air gun, which will get HOT.
If there are a choice of settings then use one that is quite high initially,
so that the whole piece can quickly be warmed. Once the wax starts to
glisten you know that it is beginning to melt, so then turn down the
temperature to a more moderate heat. Using the hot air gun with an open
ended tube (no restricter) gives a wider softer blast which is good for
general coating of a surface. |
 |
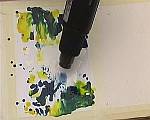
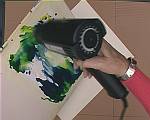
Now that the wax is up to temperature & beginning to melt
& move in the working area it is time to control the air direction & watch
the wax carefully as it flows & blends.
At first, just concentrate of getting colour to flood the surface, covering
up all the clear wax under-coat. |
 |
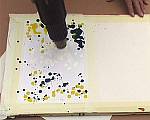
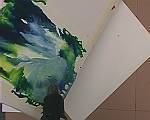
Blowing the wax colour is one way to move the encaustic
paint around. Already you will discover the blends occurring & if you have
chosen the colour well, you will see the harmonic mix emerge - here it
is a green.You are now working in a molten puddle of coloured wax where
things can happen quite fast. If you feel it is running away just move
the hot air gun further out from the work surface, creating a greater
distance between the wax & the nozzle - calm it all down!
|
 |
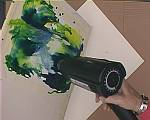
As the waxes blend & flow together it is often advisable
& best to work in one direction. This will avoid over-mixing which can
result in all the wax becoming much too uniform in colour. Watch out for
any signs of holes being blown - KEEP THAT NOZZLE ON THE MOVE.
* If you
see SMOKE reduce the heat setting immediately. |
 |
The time will arrive when you need to pick up the under-board
& begin to use the tilting & panning to force gravity to pull the waxes
as you choose. This is a bit like rubbing your tummy with one hand whilst
patting your head with the other - practise enables dexterity. If you are
at all ambidextrous it helps! The light weight of the foam core board now
pays off & the wax colours start to follow your command.
|
 |
At this stage it is still important to work hard ensuring
all areas of the painting surface get covered with wax colour. To achieve
this, flow the waxes in small areas, out towards the edges of the image,
then once they have created a covering there, pan & tilt the board the
other way to flow them back inwards again. |
 |
The higher the angle of tilt then the faster the wax liquid
will flow around & down the painting surface. You will learn to gauge the
fluidity of the wax & adjust the tilt of angle accordingly to create flow
yet prevent loss of control. |
 |
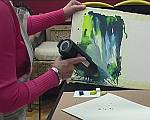
Greatest movement of the wax can be caused by lifting
the board into a vertical position & blowing downwards at the same time.
First from one end.... |
 |
... then switching to the opposite vertical position by
rotating the board 180 degrees so that the wax is now all flowing the opposite
way at the bottom & in toward the center from the new top. |
 |
Work on like this until the entire painting area is covered
with the coloured & blended wax. Tilt & pan the board, direct the air to
blow the wax, monitor the heat to ensure it remains molten & fluid but
does not overheat or smoke. Move the gun closer or further out from the
piece to increase the blasting force of both air flow & heat intensity. |
 |
Have a scrap piece of paper already lying on the
work table so that as you get in to the edges or corners
with the final coverage of fluid wax there is no concern if it drips
off. This is expected & the wax that runs off the image area has done
its job. It has helped keep the whole encaustic artwork flowing & enabled
all areas of the surface to be suitably covered. |
 |
Once this stage is reached you can simply complete the process
by concentrating on any areas that you feel still need to be changed or
re-worked... |
 |
... then, when you are satisfied, or at least willing to
accept the result as it stands, turn the work piece flat.... |
 |
... & whilst it is flat, allow it a few seconds to cool.
The under-board material is also heated up, so now feeds heat back from
below the actual painting card. Sometimes it can take quite a while for
it all to cool down into a solid state. Even then it can still be fragile,
so don't touch the surface with anything until is is totally cool - best
to remove it from the under-board first before any further surface contact. |
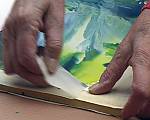 |
To do that just peel off the tape. It is better to do
this whilst there is still some warmth in the wax as the wax will then
tear easily along the edge of the tape. If the piece gets totally cold
then tape removal can cause some flaking & damage along the edge, especially
if the wax is thick there. |
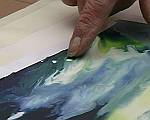 |
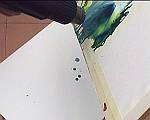
These holes are areas where no wax colour flowed. They
are probably due to the under-coat of clear wax not being sufficient
or even perhaps absent on these small parts. Preparation is the key,
so ensure ALL areas are well covered with the clear wax initially. A
quick fix is just to use the hot air gun & a small corner of tissue to
re-melt & pull molten colour into those places. It is always best to
do this at the end of the initial heating whilst the whole piece is still
workable. Once it has cooled it is far more tricky to blend it in well!
|
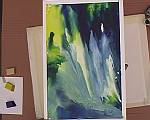 |
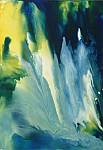
Now that the tape has been removed the white edges are apparent.
These act as an initial frame for the piece.
If there are thick areas of wax then beware of the danger of cracking
or flaking. On any flexible card or paper type surface this can occur,
so once completed it is best to fix the work onto a rigid surface. |
|
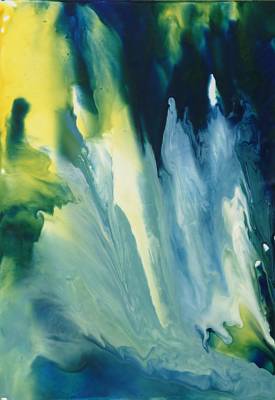
Finally the work is cool & completed.
In this case it is a stimulating blend for the imagination, inspiring all
sorts of ideas. Often a piece like this can become very different when
view with alternative edges at the top.
Ideal for fantasy backgrounds & often also used for skies, in which case
only part of the card needs to be coated with the clear wax & then worked
with colours. See the other section pages for more.... |
|
|