 |
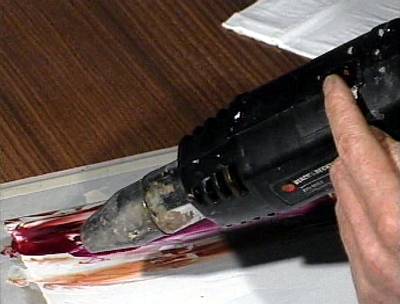
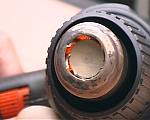
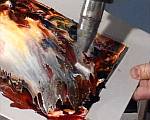
RED HOT means
the internal heating element which warms the air as it passes through the
heating tube is
extremely hot. It glows red when in use because it only has a
very short time to raise the air temperature before the blast is expelled
back into the open space of the work area. This tube can remain very hot
for many minutes after switching off. Cooling can be speeded up
by setting the gun to cold, then blowing air through for a suitable period
of time. |
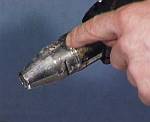 |
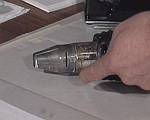
The interchangeable nozzles that are often used to focus
& increase the air flow shape usually just push fit or snap on to the main
heating tube. Be sure that any nozzles fitted are secure before
you begin working.
* Remember, if they contain vent holes point
them away from the work surface. |
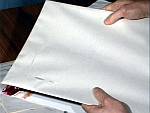 |
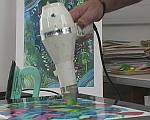
Before starting to work, prepare an under-board made
from flat solid card which can then be covered with disposable paper, like
the newsprint shown here. This will be a big aid during the blowing process
when the wax is molten and "on the move". The flexible painting card is
laid or taped onto this under-board to provide rigidity & enable easy
controllable tilt & pan movements to be made. |
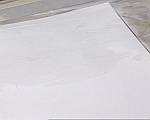 |
To make the molten wax flow easily onto
all the desired surface area of the smooth painting surface it helps
to first coat this surface with clear wax medium. On this painting
card the clear wax has been applied with the iron, creating an even
coating that has in effect "wetted" the paper. This
works similar to flux used with solder; it allows the
wax colours to flow onto that whole area because it is already 'wet',
so there is no surface resistance. |
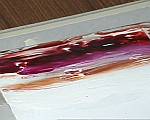 |
The colours can be applied to this clear wax undercoat in
several ways. Here the small painting iron has been loaded as for normal
working, then lightly & quickly smeared over the clear wax. The colours
have been applied in bands that merge during the spread onto the painting
surface. This is for a fantasy sky image & the lighter colours are closest
to the bottom of the spread. Use plenty of wax! |
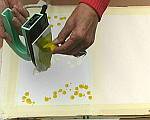 |
An alternative method to add the wax colours tot he painting
surface after the clear wax has been laid on, is to dribble the colour
off the iron surface. This allows much control of where the colours are
positioned. You will see this method used in some of the technique modules
that follow this basic introduction. Start with the lighter colours then
ont the darker ones, otherwise the iron gets tainted! |
 |
Set the hot air gun to the required operating temperature.
Often it is good to heat up the general area that is going to be worked
with the setting quite hot. Then as soon as the wax starts to 'run' adjust
down to the regular working temperature which is around 100 to 200C. The
faster the air flow speed is set then the harder the blowing will affect
the wax colours & cause them to move away. |
 |
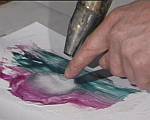
Hold the hot air gun in your usual working hand (right
if you are right handed) & use the remaining hand to hold the rigid under-board
that you are now using. The painting material will be on top of this &
thus it is easy to pan & tilt once this becomes necessary. First
warm the wax to melt point, then begin to blow & move it around. The
trick is to KEEP THE HOT AIR NOZZLE DANCING ; ALWAYS ON THE MOVE. |
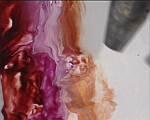 |
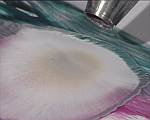
As the wax colours begin to move around & flow together
you need to keep that nozzle on the move too, always dancing so that the
air blast does not blow all the wax away from any one area, making it dry
& unworkable. Also, once molten, you may find it better to move the gun
further back from the work. A greater distance will reduce the concentration
of heat & blast. With your other hand you are able to pan & tilt the under-board,
controlling the flow & blends. |
 |
In hot air working it is sometimes necessary to allow excess
wax to dribble off the painting surface. It may even dribble off the under-board,
so have some waste paper on your table work surface that can receive this
spent wax. The work is sometimes tilted to a vertical angle encouraging
flow. During this whole time be aware of how hot the wax is & only heat
it sufficient to move, it should never smoke! |
 |
VENTILATION IS IMPORTANT.
When you are working with heated wax there is the potential for fumes to
build-up so it is very important to ensure adequate ventilation. Some
people work with just an open window. Sky lights open as well can create
a good air flow through the room. Or consider using a fan wafting gently
across the work area toward a window. If you over-heat the wax
it will fume.
...AND make sure that you hold or lay the
work FLAT WHEN COMPLETED so that the wax sets in the form you have created
rather than continues to move if placed at any risen angle. |
 |
Once you have achieved the blowing combination of pan &
tilt, spreading the wax colours to your satisfaction you will be putting
the hot air tool down. Make sure that this is done is a safe manner. Never
place the tool where you could inadvertently lean over it and thus burn
your skin! Also never let the heated parts of the gun touch or be too close
to combustible materials. SAFETY FIRST! |
 |
Remember that you can speed up the cooling of the unit by
changing the settings to blow cold air through the heating tube. This cools
the unit internally as well as helping to reduce the nozzle temperature
too. Be careful not to position the gun where the cable might pull it off
the surface. Dropping any electrical units is dangerous. |
 |
So safety is paramount! Here is the TOP TIPS LIST :
* DO NOT KEEP THE HOT AIR GUN NOZZLE TOO CLOSE TO THE WORK.
* ONCE THE WAX IS MOLTEN ONLY USE SUFFICIENT TEMPERATURE TO KEEP IT MOVING |
 |
* DO NOT KEEP THE HOT AIR GUN POINTING IN ONE STATIC POSITION.
To do this will blow holes in the wax, moving it away from that area & drying
out the card underneath, making it very difficult to remedy into a successful
piece of work. Another very annoying result can be POPPING THE CARD which
means that an air bubble forms in the core of the card, causing an irreparable
large bubbled area. *DO KEEP THAT GUN NOZZLE DANCING. |
 |
Staying in one place for a long time, especially once the
wax has blown away, will lead to overheating of that area.
*OVER HEATING CAN SCORCH OR EVEN IGNITE THE PAINTING CARD OR SURFACE
TO WHICH THE WAX IS BEING APPLIED. IT SHOULD NEVER SMOKE!!!!! |
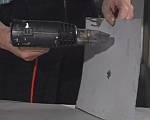 |
If you are working onto metal sheet or some other types
of painting material, then heat from the hot air gun is able to be applied
from behind. This creates 'flow with no blow' & can offer some interesting
effects. Of course, if you work onto metal then that stays hot long after
the heated air force is removed. It requires practise & experiment to discover
the optimal technique for your desired effect. |
 |
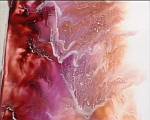
As this metal sheet is warmed from behind the wax flows
on the front. Interesting results are possible, but control is not easy
to master.
Hot air work can enable wax to be applied in a variety of ways to many
substrates, especially wood panels, treated canvas boards & so on. Beware
of over-heating alternative surfaces. Glass for example could shatter
or explode if heated!! |
 |
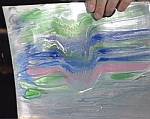
This hair dryer, which can be used just like a low temperature
hot air gun, is ideal for adding blown effects to hotplate work.
When used for blowing without the hotplate you will find far more 'blow'
effects & far less pan & tilt possibilities. It is very good for 'burst'
effects, like flowers, star-bursts, fireworks & so on. |
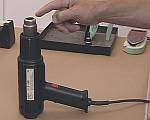 |
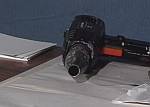
Again, beware of the
hot air gun after it has been used.
It can remain very hot for many
minutes.
Many
models can stand on their base so that the hot nozzle & tube are well
away from any combustible materials. However, if you reach over for something
just one lack of concentration gets a skin burn!
If you do ever burn yourself, then apply cold water
immediately (lavender oil is excellent too) If it is severe enough
to cause you concern then go see the doctor.
|
|
|