 |
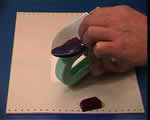
For a good fantasy castle try using a purple colour made by combining
the  and the
- load the iron in the normal manner so that when it is used the wax
is under the top curved area of the iron's base
|
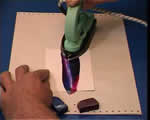 |
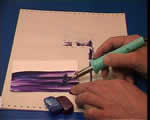
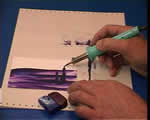
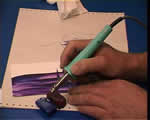
- hold the card at the top edge and then spread the wax colour to form
a horizon line - done here by placing the iron at the left side and
dragging back towards the right until the complete length of the card
has been painted over.
|
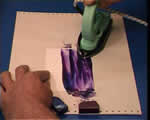 |
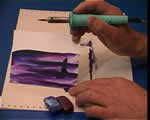
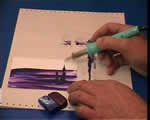
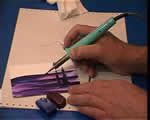
- work on down the card to create a series of these parallel bands that
will represent hills and valleys running across the fantasy scape image
|
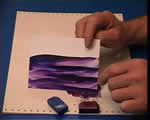 |
- the idea here is to get bands of dark and light alternating. This
is a simple method for creating an illusion of depth and receding landscape
hills - dark - light - dark - light - dark, etc.
- make sure that you have some nice dark areas toward the lower part
of the card because that is where to plant your castle foundations
|
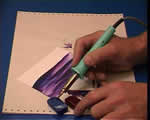 |
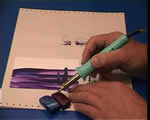
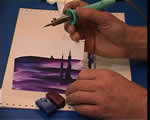
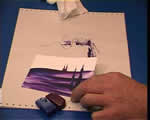
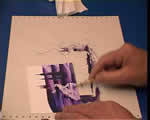
- to start the castle foundation you need to recreate the same colour
and tone as the place where you intend to plant the castle - use both
the No.12 red violet & No.10 ultra marine blue - pick up these colours
together in the stylus drawing
tip
|
 |
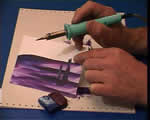
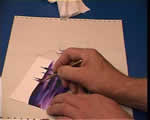
- place the tip with the slot touching the card surface
- as the wax starts to flow out scribble in a line parallel to the card's
side edge so that the lines are upright
- this example is started too high up - see the next 2 images for explanation
of this fault .....
|
 |
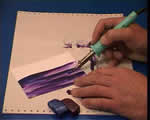
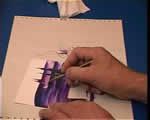
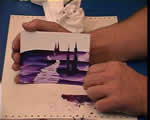
- if the castle was placed here it could easily give the impression
of 'floating' because it is a completely different colour from the 'ground'
where it is being planted.
|
 |
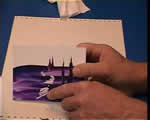
- now that the dark colour has been extended into the landscape's similar
dark foreground colour the castle foundations are firmly 'welded' into
the image. The floating phenomenon is overcome by this simple approach
|
 |
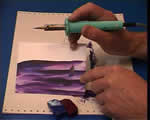
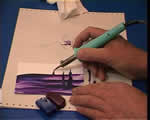
- keep building the height of the structure upwards, making sure that
it does not become top heavy, lopsided or that it is leaning
|
 |
- keep adding to the structures and start other towers as you find pleasing,
reloading the drawing tip as often as necessary.
|
 |
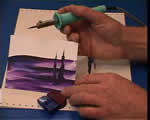
- by crossing the vertical tower over the horizon line it automatically
becomes silhouetted against the background sky. This adds strength and
visual force, making it stand out to the eye. It gains power by crossing
over the horizontal bands - in the illusion the castle tower is definitely
'in front of' the landscape.
|
 |
- don't try to draw the tower spires with slow strokes
- instead, prepare the top of the tower in readiness to receive the
final spire stroke - ideally it will become a line that ends in a sharp
pointed tip
- talking of tips, here's one about this...

|
 |
- load the drawing tip with just enough wax to make the spire
- then place the tip carefully at the top of the prepared tower
- FLICK the tip vertically up the card, lifting of as you reach the
end of the stroke so that a sharp pint is created. You could have practised
this further down the card, in the area where you made the tower, because
that part is now covered over and your practise flicks would be hidden
and merged into the final tower wax
|
 |
- if it looks something like this, parallel to the edge of the card
then you've done it well
|
 |
- now, before starting the smaller more distant towers you need to clean
off the drawing tip - as normal, just use a tissue pad and gentle squeeze
then pull the tissue away from the stylus
|
 |
- reload the drawing tip with the same colours as are in the area where
you will start the second set of castles
|
 |
- carefully begin top create the foundation structure, welding the new
colour as perfectly as you can to match the existing landscape site
|
 |
- don't position the new castles right behind the original foreground
set or a confusing image will result and the impact will be poor
|
 |
- continue to add height to the tower so that you end up with a smaller
version of the original
|
 |
- repeat the overall form of the original castles in this second distant
set - here they are both twin towers
|
 |
- the mind is easily tricked into accepting that because these castle
elements are the same overall form, that the set of larger forms are
close where as the set of smaller ones is distant - simple visual suggestion
creates the illusion of depth
|
 |
The Scribing Tool is
a metal brass rod about 115mm long with a point at one end and a twin
blade at the other. It is used to scrape off and scratch into the wax
coating.
- for the path, always start from the distant point
- begin by very carefully making a thin white scratch mark through the
top band of wax colour - our distant horizon
|
 |
- work down the landscape, being sure to keep the size of the path growing
slightly as you proceed
- be careful to keep the scribing tool strokes parallel to the top and
bottom edges of the card so that the path looks flat and stable
- 'hide' the path when it goes down into the valleys which lie between
the hill tops
|
 |
- if you do not keep the strokes horizontal then the oblique marks are
not so convincing as a path of roadway - it looks as though anything
travelling the slanted path would surely fall off to the left side!
- keep them level - horizontal - parallel to the base edge of the painting
card
|
 |
- as you work down use the bladed part of the scriber to remove larger
flakes of wax
- the path gets much wider as it comes down into the lower area of the
card - this gets the viewer's eye onto it!
|
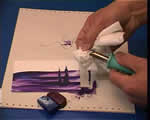
 |
- carefully wipe off the shards of wax with a tissue pad - don't press
too hard or you can cause the wax bits to act like crayon and leave
trails of colour behind them as they are wiped away
|
 |
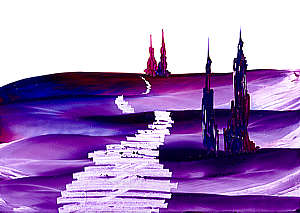
- finally the image is complete
- bands of light and dark colour enhance a feeling of depth
- larger and smaller castles create a sense of distance
- the hidden path conveys an understanding of the terrain
- the eye is drawn into the picture and the distant castle
|