TECHNIQUES of Encaustic Art    Return to HOME PAGE of www.encaustic,com     Visit one of our sponsor sites   
Iron,  Stylus & Hobby Crafts Methods Assemble a mini hotplate using the encaustic painting iron Hotplate Techniques Zone Hot Air Methods Zone Finer Art Approaches for Encaustic work
DEVELOPMENT
IRON & STYLUS
IRON AS
HOTPLATE
HOTPLATE WORK
HOT AIR WORK
ARTISTIC
WORK

ONLINE PROJECTS
Brush Head for use with the Encaustic Low-heat Stylus ...
      

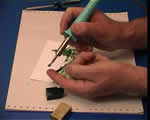
The stylus wire brush head is made to operate at low heat. The collection of fine copper wires are crimped into a brass rod which slides into the heating element of the stylus.

This is a fragile tip and needs to be treated with care or the wire fibres will become bent and tangled, making it far less useful.

One difference between this brush and a regular hair brush is that the metal fibres bend and stay where they are bent to.

You can always straighten them up again, and sometimes, if you want a very thin brush, it can be handy to bend some of the fibres out of the way.

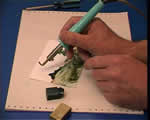
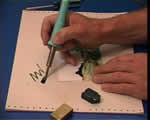
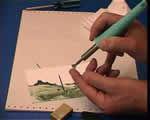
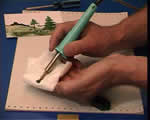
Loading the brush head with small amounts of colour is achieved by gently placing the wire ends onto the wax block and allowing them to slowly melt into the wax intheir own time.

Stabbing them into the wax will just destroy the wire fibres and wreck the brush head

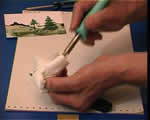
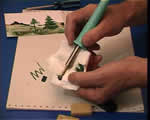
Once loaded the brush is best used in a 'trailing' manner wiht a very light contact pressure. remember that pressing too hard willl bend the wire fibres.
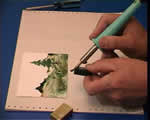
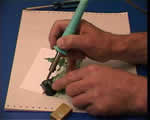
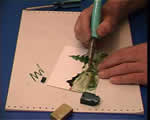
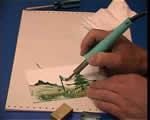
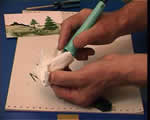
For bigger amounts of wax it is quicker and easier to rest the 'heel' of the brush, where the brass rod ends, into the wax block. This melts the wax much faster and floods the wire head until it is completely full.

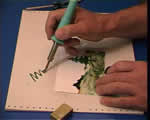
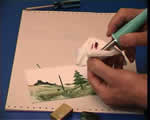
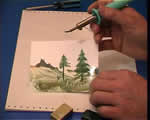
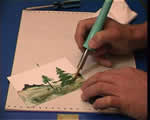
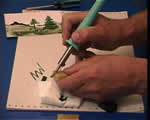
A brush head filled with wax behaves much like a 'wet' watercolour brush, and the wax paint will flood off onto the painting surface very quickly, leaving solid trails of colour.

Fir tree example

  • load the brush head using the heel method so it is filled with wax colour - No.23 Olive Green
    • place the brush tip gently onto the card as you start the upward stroke
    • keep the line of dark green wax heavy and vertical (parallel to the card edge).
    • at the top end of the vertical line lift the brush head off whilst still moving so that a nice fine top spike is formed.
    • clean the brush head by holding a tissue pad in your free hand and placing the wire fibres carefully into this.
    • always pull the brush head towards the stylus handle
    • NEVER push the delicate wire brush forwards or the fibres will damage
    • the wire fibres should be free of ona another and can be carefully seperated into a splayed fan shape to make finer strokes possible - a damaged brush head will not allow this
    • with no wax loaded onto the brush use the fanned out firbes to gently remelt and tease the line of wax already deposited into the fir tree branch forms
    • no new wax is necessary at this stage, just carefully get the basic tree shape formed
    • for the second side it is often easier to turn the card upside down and just mirror the form you have made on the first side.
    • continue to work down the tree form until it is completed - this example has been stopped half way down because of time constraints in making the video that has been used for the source of these step by steps.
    • now to add a more 3 dimensional feeling to the tree partially load the end of the brush head firbres with a little wax and carefully dab this in 'skirts' onto the existing tree structure - start at the top and work down. the lower you go the more wax you will need to load onto the brush.
    • You can see here that the 'skirts' add a more 3D effect, giving depth, weight and shadow, especially compared with the original half done tree which looks like it has been sawn down through the middle.

    When you are finished or want toclean up the brush head to pristine condition follow this procedure :

    • start by wiping the head in a tissue pad as before
    • remember to always pull the brush head towards the stylus handle and NEVER push the delicate wire brush forwards or it may damage the fibres
    • repeat this wiping process until there is no further trace of wax dirt showing on the tissue
    • next place the heel of the brass rod into some clear wax and allow this to dribble down through the brush head and drip of onto the tissue pad. The clean uncoloured wax will, in effect, wash out the 'dirty pigments' that remain hidden in the wire fibres.
    • again, wipe the newly cleaned head through a clean part of the tissue pad. If there are still traces of dirt then repeat the clean wax process again, but this is rarely necessary.

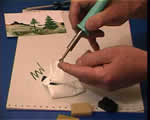
    You can check the condition of your brush head by testing to see if the fibres will seperate out into a fan shape. If they are too tangled then this will not be possible.

    The brush is very useful for careful working and small internal areas of paintings, but equally it can be used to create complete and large artwork in many interesting styles.

            GO TO Go to the index for encaustic art products OVERVIEW
    Arts Encaustic Ltd, Glogue, Pembrokeshire SA36 0ED UK
      Tel: +44 (0)1239 831401               info@encaustic.com