


DEVELOPMENT
ONLINE
PROJECTS
|
|
|
|
|
DEVELOPMENT |
ONLINE
PROJECTS |
|||||
Rubber Stamping directly into encaustic art wax on a heated surface |
|
Get a flat low-heat surface |
Melt wax onto a scrap card |
 |
 |
|
1. Use the encaustic painting iron in the upturned position
so that it resembles a small hot plate surface OR if you have a hotplate
at about 85°C /170°F then use that - an electrically heated food
warming tray with a thermostat is often the ideal temperature. Then, place
a scrap "palette card" onto the heated surface and melt some
of the desired wax colour onto it.
|
2. Complete the palette of colours on the card surface,
ensuring that there is a good covering of wax without pools forming!
|
"Wax" the stamp |
Check it is evenly coated |
 |
 |
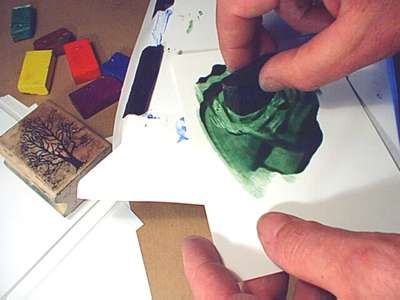
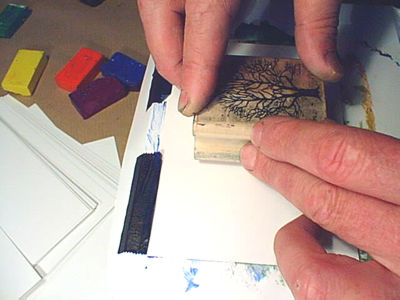
| 3. Carefully take the stamp that you want to use and place in into the wax on the card, just as if this was the ink pad. "Puddle" the stamp around a bit to ensure it gets a good even coating without being "swamped" in between the finer grooves of the stamp design. | 4. Check the surface of the stamp to ensure there is a good coating of wax on the stamping surface. It doesn't matter if the wax cools down on the stamp during this time. It will soon re-melt when applied to the surface of the printing card. |
Place a fresh card on the heat |
Press the stamp on then lift off |
 |
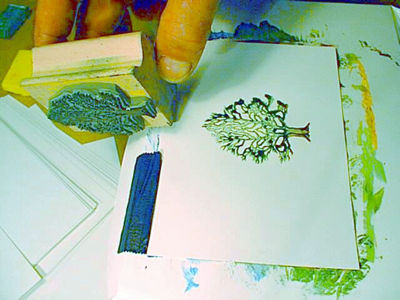 |
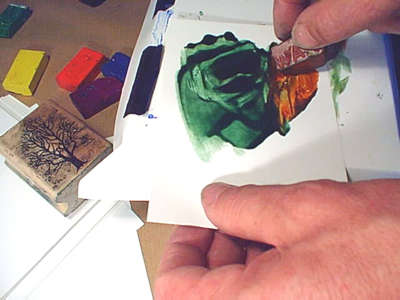
| 5. Place the card onto which you want to print the wax stamped image face up on the heated surface (upturned iron or hotplate). Press it down carefully but firmly and allow a few seconds contact to ensure the wax has time to melt off onto the card beneath. |
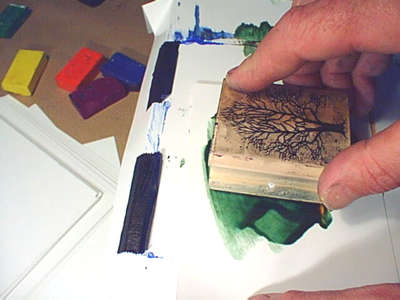
6. Lift off the stamp and you should find a perfectly formed image of
the stamp formed entirely of the wax colours from the card palette used
to coat it earlier. |
Alter whilst still warm |
Polish artwork : Clean stamp |
 |
 |
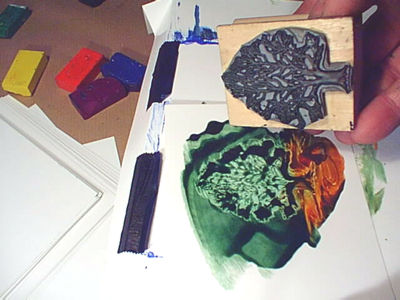
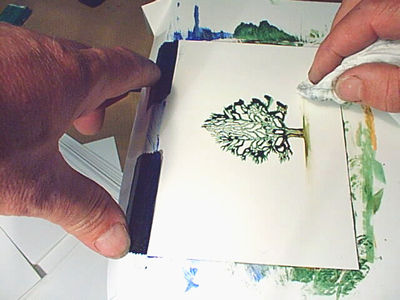
| 7. Whilst the wax stamped image is still on the heated surface the molten wax can be reworked. In this tree image I used the edge of a tissue to wipe through the base of the tree, forming some earth for the tree to stand on. That's a better idea than having a floating tree! | 8. Take it off the heat to cool - then it is finished. You can polish
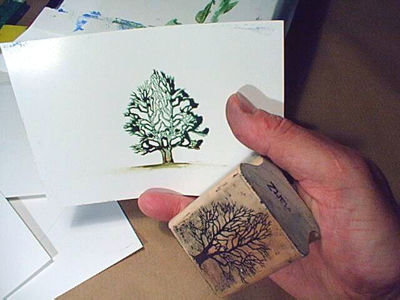
the wax as normal if you like, but don't press too hard or the wax can smudge. Cleaning the stamp: heat the stamp up on a scrap card on top of the heated surface. Whilst it is warm dab with a clean tissue. Repeat several times until no more wax comes off. For total perfection, wipe over with some solvent - I use window cleaning spray. |
|
This technique may appear simple, but it can be very
powerful used on larger work
|
|
|
Remember that you can also use permanent markers and ink pens to draw in any graphics you wish. If you do this direct onto the card then the inked image is permanently attached to the card. If you use markers on top of the waxes then any alterations made to the wax artwork will destroy the inked additions on the wax surface. ..take a look at this short printable article on stamping with wax ...examples in the gallery section. ...or back to techniques index |
| GO TO |
|