DEVELOPMENT
ONLINE
PROJECTS
|
|
|
|
|
DEVELOPMENT |
ONLINE
PROJECTS |
|||||
| Hot Air : Heat Gun work with tissue & sponges. | |
|
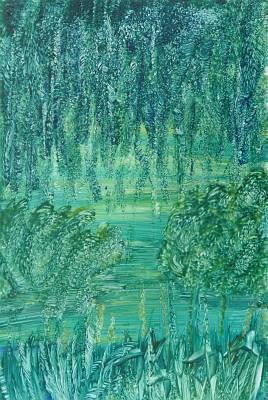
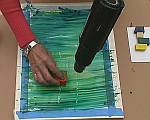
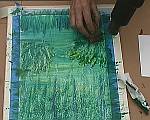
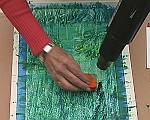
A hot air gun can be used simply as the heat source solvent for the wax colours. So that rather than blowing or dribbling the encaustic paint around you can define far more carefully how & where the colours are placed. This image is shown live on the DVD "From Hobby to Art" with Elisabeth Van Uden. It aims to demonstrate & clarify a number of techniques that can be effective in creating an encaustic image without using heated tools in actual contact with the wax colour. The waxes remain workable whilst the heated air is present.. It means that you can freeze & unfreeze the paint at any time, so changes are always possible. When the heat gun is used in this manner the ideal setting is a soft airflow at sufficient heat to keep the wax molten, but not hotter. This enables small areas to be worked upon rather than the whole thing being "live". * Remember that when you click any of the thumbnails the current selection will be replaced in the pop-up window with the newly clicked one. |
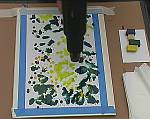 |
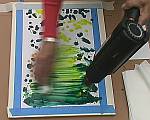
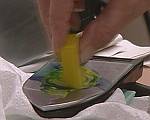
An A3 card has been taped down onto a rigid foam core underboard, then it can be coated with clear wax to aid flow of the colours or the colours can be added directly onto the card. Either way, the chosen colours are dribbled on using the iron in a vertical manner as seen in basic hot air blowing preparation. Then the hot air is directed gently over the initial working area to melt the wax. |
 |
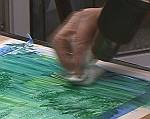
As the initial colours begin to soften, then melt, a clean tissue is used to lightly and swiftly wipe across thorough the molten colour. This removes some of the wax and at the same time spreads out what remains.
|
 |
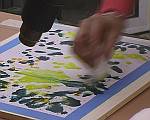
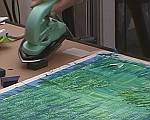
The hot air gun is set at a moderate temperature - perhaps around 200C or even less. If it is too hot then the problems discussed about over-heating can arise. Continue wiping ever so lightly across the wax so that it spreads and blends. This will become the image background. |
 |
Every now and then you may need to take a fresh piece of tissue that you then crumple into a suitable shape or fold into a pad. Elisabeth uses a more crumpled tissue pad, which is easier to hold and quicker to change to a fresh part when it gets soiled with colour that is too dark. |
 |
Working down, out and over the edges of the board, the colour blending happens naturally. Careful though, for it is easy to over-work and this results in rather uniform tones throughout the piece. |
 |
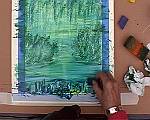
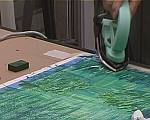
Notice how Elisabeth has retained a light are in the more central zone. This will help create depth and draw the eye into the image, so long as it does not get lost or over-worked in the later stages. |
 |
A few final touches here and there, with the hot air always dancing and moving around.
|
 |
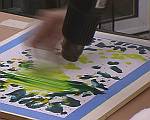
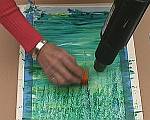
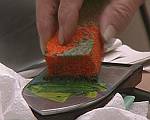
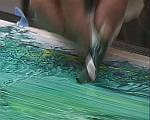
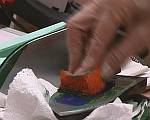
The orange item is a sponge and it can be used very effectively with the hot air techniques. All sorts of sponges are available but many can burn, so please be careful that the type you choose performs safely. Test a small piece to see how much heat it can take, then respect your findings! |
 |
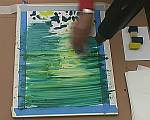
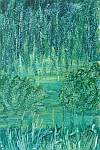
Dabbing into the wax with either the long or short edges creates a useful foliage effect. Here Elisabeth is representing hanging willow boughs, so this is an ideal method. If you have excellent temperature control on your hot air gun then turn it to a low and sensitive heat - just enough to melt the wax. |
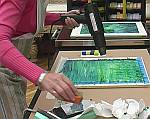 |
The small painting iron has been upturned to create a mini hotplate palette. Now wax can be melted onto this warm surface and then the sponge is dipped into the colour and loaded, ready to be deposited on the image. |
 |
Elisabeth works on down the foliage lines, carefully developing and discovering a balance of form for the shape and detail of the tree. The hot air gun nozzle is always close to the area being worked but also probing into the next place where work will be done. This way the area is warmed by the time the sponge gets there. |
 |
Edging in some darker blue helps begin to define depth and shadow. It should be pretty obvious by now that if the gun is too hot during this work then your fingers are going to send messages of complaint to your brain saying "Turn the heat down to the least necessary for it to work". Your brain will respond with "Yes, that's good advice". |
 |
Melting more yellow onto the iron... |
 |
... then loading the sponge once more. |
 |
The more a piece is worked then often the more difficult it becomes to retain the lighter colours and create good contrasts of dark and light. But remember that with a clean tissue any area can be cleaned out and fresh pure colour added back in. |
 |
And that is exactly what Elisabeth is doing at this stage. To improve the light in this important central are a yellow block is being crayon melted into the place where it is needed. This technique is used a lot in hotplate work, but with a good hot air gun it is equally approachable and instantly adds fresh clean colour. |
 |
Now the lightening can be blended in with tissue....
... being considerate to the wax and trying not to over-mix it all. |
 |
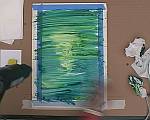
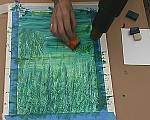
A stronger foreground with some more direct colour molten crayoning. Having a darker border or outer area is always helpful to the visual framing of the lighter center. |
 |
A rolled tissue tip can be used effectively to draw shapes in the wax as well as move colour around. This is helpful for more detailed work toward the end of creating an image. |
 |
As the foreground will "over-paint" the background, fine foliage effects are very desirable. All sorts of tools or implements could be utilised with the hot air approach. After all the hot air is only providing the solvent and so long as the tools you choose can withstand the moderate heat being employed then there is almost no limitation. |
 |
More sponge work and you can see clearly how the yellow wax that has been added remains clear to see at this stage. * Remember, it is very easy to over-mix the colours. |
 |
The iron's edge is settled into the green wax block so that it gets covered with molten green wax. |
 |
Then it can be used to add lines for stems or leaves or whatever the artist working the image desires. |
 |
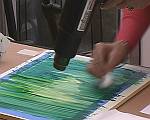
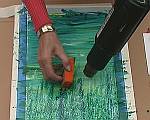
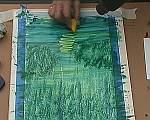
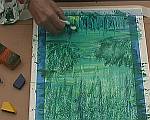
Final adjustments to the shading. Here some darker blue is loaded off the mini hotplate iron onto the sponge, then added into the image .... |
 |
... creating more contrast and defining shadow and depth. This demonstration piece teaches many things and it is an approach well worth exploring. It can work well on canvas too, so try it out sometime. |
 |
All in all, if Elisabeth had not been under the pressure
of cameras demanding swift completion then more foreground shading & depth
could have been worked into this piece. But as an example of how to approach
use of hot air with cold hand held tools, this is a good tutorial demonstration
to watch & learn from. Thanks
to Elisabeth for facing those unremitting cameras that tick tock with
pressure. The artistic state is far less time oriented and much easier
to live in! |
| GO TO |
|