DEVELOPMENT
ONLINE
PROJECTS
|
|
|
|
|
DEVELOPMENT |
ONLINE
PROJECTS |
|||||
|
||||
ADDING COLOUR |
Adding colour to
Encaustic Wax Medium |
||
 |
Once you have a source of the encaustic wax medium you may want to colour it. This section looks at simple ways to mix pigment into molten wax medium. It is not meant to be definitive nor is it comprehensive, but it is a good introduction for home studio working and hopefully will help set some useful and practical guidelines. |
|
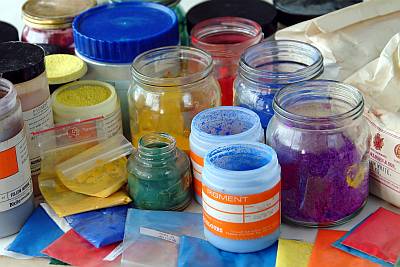 |
Pigments are basically ground up dirt of the desired colour. Materials that get ground up are chosen not only for the colouration but also for their stability - the best ones remain that same colour through long spans of time. Some are natural, like rock, but others are man-made... |
|
 |
After making your wax medium it will probably need to be coloured, usually with finely ground pigment particles. On this page there are a few different approaches to colouring varying
amounts of previously made encaustic wax medium. |
 |
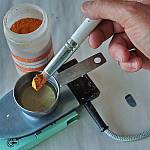
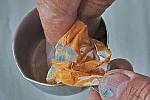
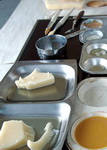
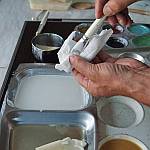
The first one is for small quantities where the encaustic painting iron is used in its mini-hotplate upturned form as an electric stove for heating small metal vessels of wax. Washed food tins, measuring cups or small metal pots are all good for this. Even strong paper cake cases or foil cake cases can be used effectively sometimes. Vessel & mold in one! |
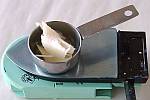 |
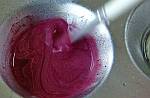
This small stainless steel measuring cup is like a tiny saucepan and works perfectly for this approach to adding colour. Break off a small amount of encaustic wax medium (or melt and pour from a larger vessel) then allow it time to melt - work at low heat. |
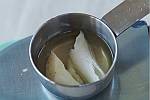 |
As the encaustic medium melt slowly the wax will appear more transparent. But don't forget that on cooling the creamy haze will return and can affect the wax colour to some degree, especially for very translucent pigments or dyes. |
 |
A small rubber tipped scrapy tool is used here to decant some pigment into the molten wax. How much pigment and what types you use depend on your choices about
the final qualities of colour desired. Translucent or opaque, weak or
strong colour, and so on. |
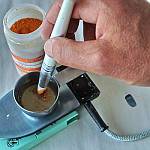 |
Place the pigment carefully into the molten medium. Use pigment that is milled (ground down) to the particle size you want. The finer the dust the more fluid the final paint and the more even the colour coverage. Some pigments have an optimum particle size offering maximum refraction of light and thus greatest vibrancy of their hue quality. |
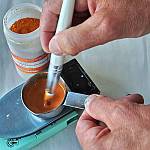 |
Mix in the pigment, working it through and through until the resultant paint is an even liquid colour. |
 |
The rubber tip used here is ideal for squashing the pigment against the side of the metal container. This action helps to wet all the pigment and separate the particles fully so that the colour is extended evenly throughout the liquid wax base. At the end of the mixing give the wax a final twirl to ensure all the pigment is mobilised within and throughout the liquid ... |
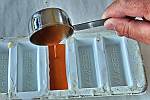 |
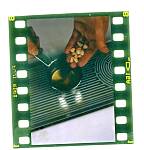
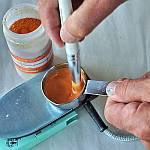
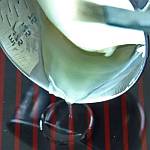
... then pour it out into the awaiting mold - here a beeswax mold is being used. |
 |
The stainless steel metal container needs to be cleaned with tissue whilst still warm. |
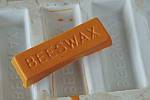 |
Once cool the wax casting can be "popped" out of the mold and is then ready to be added into your collection of usable wax colours. |
 Up to Index |
This sample has been torn in half before it was too cold, so that the distribution of pigment can be noticed. This is a good mixing and the colour is apparent and even throughout the entire wax volume. This is in contrast to separation that occurs when the pigment is heavy, the wax is too deep or too hot when cast. |
 |
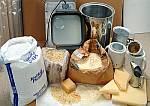
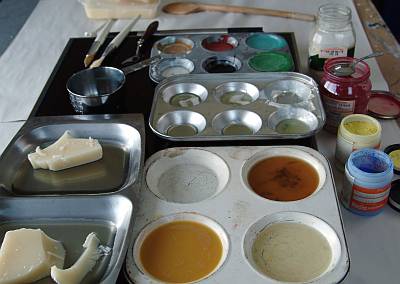
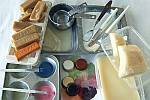
The next step up from small individual casting of colours is to make a larger batch mix. For this we have used a hotplate as the heating device and on it placed a flat bottomed stainless steel serving dish that has a large heating surface area enabling low temperatures to melt larger quantities of wax easily. Tall vessels are not recommended unless they have a surrounding heating element (like the wax melting pot for instance). Note: at top of image there are tools laying on the hotplate keeping warm and thus ready for immediate use. |
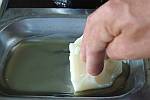 |
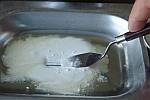
A piece of encaustic wax medium is melted onto the metal surface of the stainless steel tray being used as the mixing well. The wax could just be laid in it to melt, but the pressure and movement around the vessel make for faster liquification. |
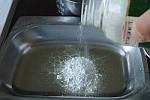 |
Once sufficient wax is molten some pigment - white in this case - can be added. Remember the dust warning from above (cautions). The amount of pigment added here is more than necessary, but at this stage it is easier to mix evenly into a creamy consistency. |
 |
Adding pigment to the full volume of wax makes it more difficult to blend evenly. Better to work like a chef making a sauce and start with everything thicker, then thin it down into a more liquid form later, once the pigment is all wetted and distributed well in the lesser amount of wax. A small flat flexible palette knife is the mixing tool this time. |
 |
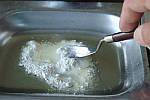
Slowly the dry dusty pigment gets wetted by the wax and all the pockets of air are evacuated. Work carefully at this stage to ensure best possible mixing so that when you add more liquid wax it simply extends the creamy paste into a less viscous paint. |
 |
By now the wax and pigment are nicely united and the creamy consistency shows an even and smooth consistency. |
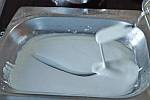 |
Work through the entire area of the mixing tray to be certain there are no lumps or dry pigment crumbs left. When you are sure then further wax can be added. |
 |
The small measuring cups are useful for holding molten encaustic medium ready for adding to the creamed pigment. This is a way of extending the volume of wax and weakening the pigment density. Proportions depend upon your requirements! |
 |
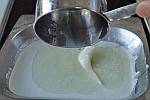
Now a hogs hair brush is used to mush and stir the new liquid wax into the creamy pigment paste. Work thoroughly to create a smooth running liquid paint. |
 |
Add more plain wax medium if the pigment is still too dense for your needs, then work it is well, stippling the brush head up and down and stirring all together. |
 |
Notice the small measuring cup on the hotplate, containing wax that is melting, soon to be ready to add is needed. |
 |
Of course, if you have a wax pot or larger volume of molten wax available (use a skillet if making lots of colours) then a ladle can be used to add in further base wax medium. |
 |
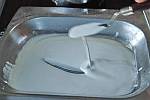
Final mixing, to make sure that everything is well blended and totally smooth .... |
 Up to Index |
... then clean off the mixing brush. Your white wax paint is now ready to use. It can be left in a mixing tray like this, then let to cool when not in use, or it can be decanted into molds for smaller pieces to be formed and then reheated or used as necessary. The key is to ensure an even distribution of pigment through out the mixture. Particles that are too big will sink. Always stir the wax mix before using the paint. This ensures maximum distribution of even colour. |
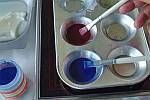 |
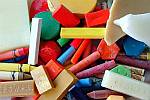
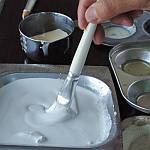
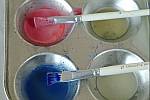
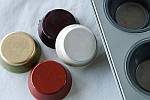
Small amounts of several colours can easily co-habit a muffin tin palette. One brush to one colour enables clean fresh paint to be applied to your artwork. |
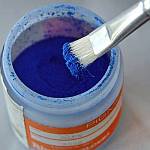 |
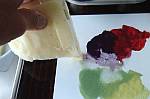
A little amount of encaustic wax medium is first melted into one of the wells of the flat bottomed muffin tray. The a brush is dabbed into the pigment pot to collect an amount of coloured dust, ready for adding to the wax. |
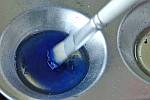 |
The brush with its load of pigment is then dabbled about in the waxy well of the tin, causing the colour to mix through the wax to form a particular hue of encaustic paint. |
 |
This red mixture is now having a little white added to change the nature of the colour from partially translucent into a more opaque tint of pinky red. |
 |
As the new white mixes in the hue changes and the milky opaqueness becomes more apparent. In opaque colour the light will bounce off the surface particles whereas in translucent mixes more light penetrates the medium depth, creating a glowing quality to the colour providing the support is light reflective. |
 Up to Index |
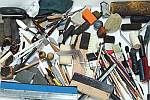
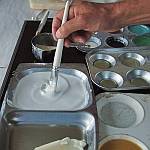
The wells of wax paint remain ready for use with their respective brushes also warmed and ready to hold and apply their load when chosen. Palette trays can be created then used and added to ad infinitum, but always stir the wax paint immediately before use. |
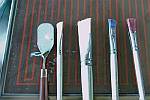 |
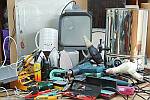
Tools can be laid with their working heads resting on the hotplate so that they remain warmed and always ready for action. A thick piece of wood can be used (just at bottom out of shot) to rest the extending handles onto and keep the heads of the tools in position without heating up the handles! Use natural hair brushes only!!!! |
 |
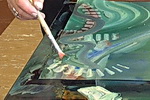
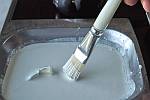
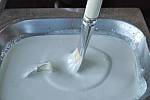
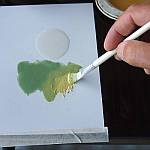
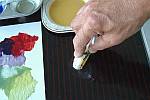
Pour out a small amount of liquid encaustic medium onto the hotplate glass surface. Aluminum hotplates will create a tainted colour due to particles of this soft metal being eroded by the mixing of the pigment (abrasive action). Glass is best but stainless steel is ok. If you don't have a wax pot of vessel of molten wax then just hold a solid piece against the surface until sufficient is melted off. |
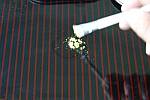 |
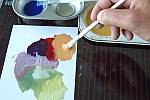
Then with a brush dabbed into your pigment mix the powder into the liquid medium. |
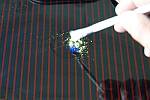 |
Add further colours, so like the initial yellow, we now add blue to create a greenish hue. |
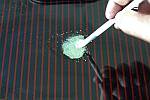 |
The wax colour in now ready for use, either direct from the mixing brush or by presenting it with another tool. |
 Up to Index |
The hotplate surface can easily be cleaned off with tissue whilst warm. Note: small amounts of wax can evaporate, especially if the hotplate is set a bit high. So as well as always remembering to work with good ventilation, notice that you may need to add a little further wax medium to re-liquify the pigment if it has stood for some time. |
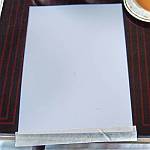 |
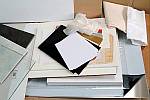
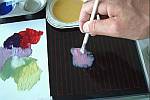
An interesting and very useful alternative to direct wax mixing on the hotplate surface is to create palette cards. These begin life as a piece of non-absorbent card taped in position on the hotplate surface; so it stays where you want it to be! An A5 (6"x8") is ideal for small arrays of colour. |
 |
Pour or melt on your plain base encaustic wax medium, then begin to add colour. The brush here is dabbed into a pigment, then worked into the wax. The hue can be maintained, lightened or darkened and so on depending on your colour mixing choices. |
 |
Further wax can be added into the card areas at any time. |
 |
To clean the brush simply melt some clean wax onto the hotplate surface and dabble the hairs into that liquid to begin the washing process. |
 |
Continue to mobilise the colour in the brush until it is ready to be wiped off. |
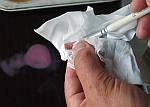 |
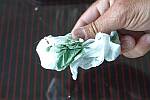
Then use a tissue and wipe the "dirty" wax out of the brush hairs. Repeat with clean wax until you are comfortable with the state of cleanliness. |
 |
Now that the brush is cleaned a totally new hue can be mixed without fear of contaminating colour. Whilst warm and molten the colours can be utilised from this card palette at any time. |
 Up to Index |
Card palettes are very useful for creating a close harmony of tones, for skin colour for instance. If a stylus is used to collect and apply the colours then the card need not be heated. Card palettes can be kept for years and added to as they are consumed. Why not consider making a range of them for that specific tone to be available and at hand on demand. |
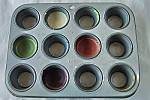 |
This deep welled muffin tin is a great mold and mixing tray for making many colours at one session. The flat bottomed tray absorbs heat easily from the hotplate. |
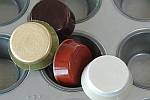 |
When colours are mixed in these wells they can be left to cool, then popped out, provided the metal's surface and shape encourage this. A non-stick surface coating that is glossy will help and a good raked angle on the sides of the wells will also make it far easier to de-mold the finished wax colours. |
 |
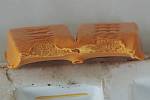
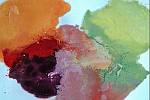
Settlement is a problem that you will no doubt encounter. These images show a range of different pigment particles in wax and the resultant cooled issues. Here a pearlescent mica was used. These particles are large and heavy and have settled out during cooling. |
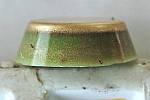 |
In this example a gold metallic pigment was used. Again the particles are heavy relative to the wax and the slow cooling period gave them time to settle (sink) out prior to reaching a congealed and then solid state. If settlement or sinking pigment is a problem then let the wax begin to congeal before pouring. As the wax loses liquidity continue to stir the pigments so that when the wax does congeal and re-form to a solid state that the pigment is well distributed. |
 |
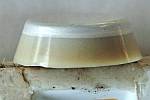
This red-brown colour is a finer ground pigment and the particles have remained suspended much better. These lighter finer particles of colour have not settled so fast. Therefore the distribution is better. Of course, if you are re-melting the whole piece into a liquid form in order to use your technical approach then the settlement is not important provided you stir the wax each time to come to use it. |
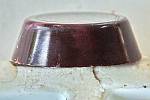 |
This example is the best of the four shown here. The pigment is fine enough not to have settled out during the cooling time. The mold is not too deep and the wax was not too hot at pouring time.
|
 Up to Index |
The moral of the pigment settlement story is
to: |
| Time to go back to the main menu | |
| GO TO |
|