


DEVELOPMENT
ONLINE
PROJECTS
|
|
|
|
|
DEVELOPMENT |
ONLINE
PROJECTS |
|||||
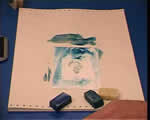
| Stamps with Ink : rubber stamps combined with encaustic ... | |
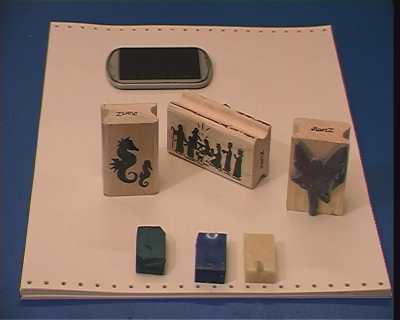 |
Rubber stamps allow anyone the ability to reproduce a graphic, despite their possible inability to draw skillfully. For hobby applications, greetings cards and even fine art work stamps can prove very effective. So long as DYE INK is used the wax can safely be worked over any stamped image with reliable results. Pretty much all rubber or polymer stamp will work. Solid silhouette designs are ideal for starting and give strong visual results. Detailed stamps need more care and thought for successful application. |
 |
There are many types of rubber stamps available in the market place today. If you use black ink then all white area will show up the colour from the wax applied over the stamp. As a subject think about whether the image is naturally "see through" or not - Example: a tree in winter is see through so the white areas will show the background landscape you paint. |
 |
However, a penguin has a white tummy but is not see through, so if you create a landscape over the penguin stamp it will initially look as though the penguin's tummy is missing because you will see right through to the landscape "behind". So in these situations you need to scratch or rub off the wax from the white tummy area so that it remains looking correct. |
 |
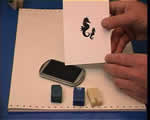
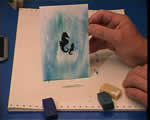
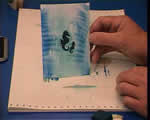
Floating subjects, like these Sea Horses, are the easiest to incorporate effectively because they just float around and do not have to stand or join the waxed image environment we are going to create. Use a DYE ink pad NOT PIGMENT. Dye will stain the card but pigment will sit on the surface and then smudge when the wax is applied. |
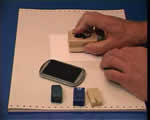 |
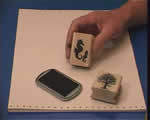
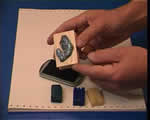
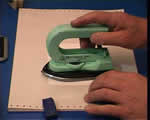
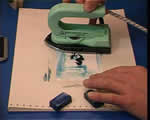
Ink the stamp carefully, the make the print onto the encaustic painting card where you want the stamped image to occur. Either leave the ink to dry off (normally about 20 minutes) or take a tissue and lay it double over the wet ink, then carefully iron over it to warm and dry the dye ink instantly. The natural drying will give a darker result because you are not removing any of the ink. |
 |
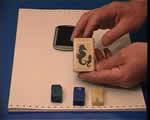
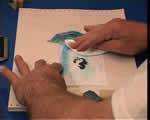
Once the stamp is dry you can begin the wax application.
Black ink has been used here because black absorbs all other colours of
light - so no translucent waxes that cover the black area will show up.
Opaque colours like white or pink will show (like chalk on a blackboard),
so choose your colours carefully. ...see problems below |
| To help the translucency of the wax
it is important to use clear wax medium |
|
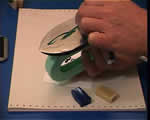 |
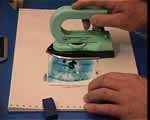
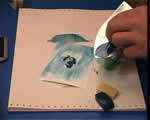
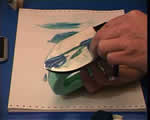
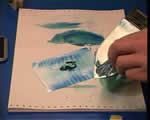
Next begin to add in the colours that will be used in the
image. The underwater scene for these sea horses will be lighter in the
middle stamped area, so start with |
 |
Don't add too much colour - if it looks too weak after the first wipe over the stamped card you can always add a bit more. |
 |
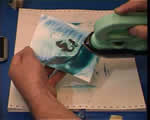
Next add some darker |
 |
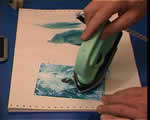
Now wipe the colour over the stamped image on the painting card. You may need to traverse the card several times to get a nice smooth colour flow. Remember, if it is too light you can add more colour - if it is too dark then add more clear. You can also always wipe off any real excess with tissue then reapply as necessary. |
 |
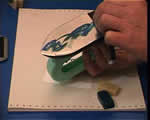
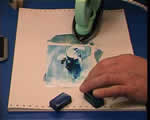
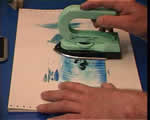
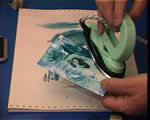
Once you have the wax colour in place and all over the card surface it is time to texture it so that pleasing forms are created that suit the sea horse image. |
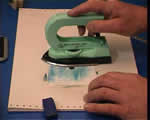 |
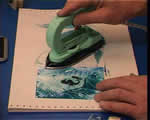
Smooth the iron over the wax lightly looking for that one time background
that you feel will suit the sea horses. |
 |
It is always best to accept the first effect that looks good. It is all too easy to want to try just one more time, only to wish that you could get the former result back again (sorry, once it is gone it is gone!)
|
 |
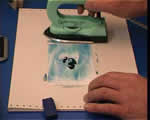
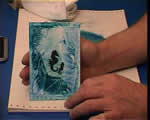
Now the sea horses are comfortable in their new environment, and it is time to start developing the scene. |
| PROBLEMS?? | Whoops! - don't do it like this.... |
 |
If you use very dark colours then you can hide the stamp - not a good idea. |
 |
... but all is not lost, just remove the dark colour or add more clear until it is light enough to see through.
|
 |
NOTE: the stamp is unaffected by the wax that lays over it. You can always use the iron's edge to scrape off the wax, and there you will faithfully find the sea horse waiting for a small act of kindness - for you to create a beautiful home for them to enjoy. |
 |
Of course, adding an opaque colour is equally destructive, in fact it is worse, because even applying clear wax into this situation will not easily remedy it - the opaque colours are like chalk on a blackboard and will continue to hide the underlying graphics. |
 |
If the worst happens and it all looks like a big mess then it is time to use a pieces of tissue, heat up the wax with the iron and then WIPE IT OFF whilst it is still warm. The good news is that the stamp is still unaffected by any mishaps with your wax applications over it, so simple put more wax on... |
 |
.... back to the application step using : |
 |
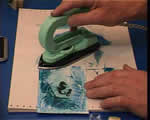
An interesting effect for underwater can be made by juddering the iron as you smooth it over the wax colours on the painting card. This is a bit like a nervous shake in your hand and gives a stuttered look to the wax that resembles water currents or wave forms nicely. |
 |
Once you have created an affect over the stamped image that you find pleasing it is time to consider embellishing the piece. |
 |
Often it is effective to remain with a simple palette that reflects the
main colours already used - in this case Start with some strong dark colour to create rocks and a border that will "contain" the light and message of the image. Load the iron... |
 |
.... then spread the wax on to make the lower rocks |
 |
...move some of the colour up so that you are working around the sea horses without going over them. |
 |
Add some of the dabbed effects that are ideal for resembling coral and look great in this underwater situation. |
 |
Work down the edge, overlapping the iron by about 10mm or 3/8" to create a border strip. If you again "judder" the iron as you go then you will find quite a nice "watery" effect is created. |
 |
Work down each of the four edges to complete the border... |
 |
... and add a little more darker colour to this if you find there is not enough being dragged around by the iron. |
 |
Rubber Stamps combined with Encaustic Art can give excellent results by themselves, but remember that you can always use the stylus to "wax over" the original inked image and thus make it your own complete image. Choose the stamps you will use carefully - they are the message. |
| GO TO |
|