


DEVELOPMENT
ONLINE
PROJECTS
|
|
|
|
|
DEVELOPMENT |
ONLINE
PROJECTS |
|||||
| Iron Sky :create a molten wax sky using the low heat iron ... | |
 |
The full sky and landscape can easily be created by use of the iron and wax colours, employing the four basic effects already covered in the previous topics. Abstracts are a good way to practice and gain control, but landscape is a good test of your skill and ability to put each effect where it is needed. Once these basics abilities are grasped your potential for larger and more varied landscapes is endless. |
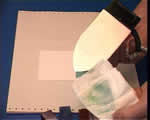 |
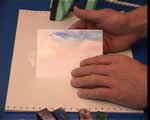
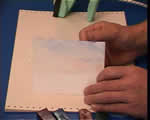
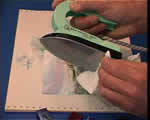
Start with some clean underpaper, a fresh piece of A6 painting card and a nice clean iron set at a low temperature. |
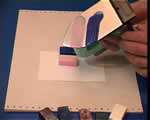 |
To determine how to load the colours onto the iron do this simple experiment. Place the wax blocks onto your painting card in the order of colour that you want in the sky. The run the iron over the card in the same way that you will when you finally spread on the real wax colours from the iron. Now look at the iron's face to see where the various colours need to be placed. |
 |
Now you understand where the colours need to go you can load the iron
properly applying PLENTY of  |
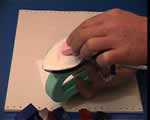 |
... then add bands of  |
 |
... and a SMALL amount of |
 |
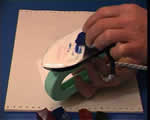
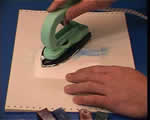
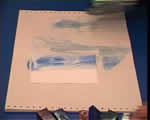
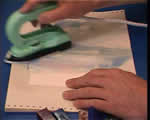
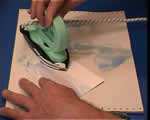
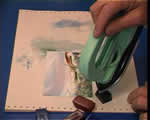
Now gently spread the colours over half of the card, keeping the irons point at the lower edge so that it can not leave a line through the sky. |
 |
Work right the way across the card in a smooth stroke and ensure that you slide the iron completely off the card before stopping or lifting it off. |
 |
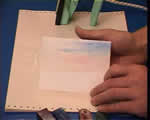
It should look something like this. |
 |
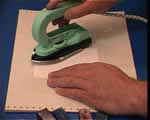
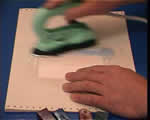
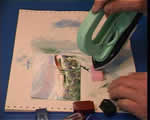
You can go over it again as often as you need ... |
 |
... but you should change direction of the stroke otherwise all the wax will eventually be wiped towards one end of the card or even right off it. So work one way and then the other. |
 |
Fast light strokes where the iron "takes off", will result in more fluidly textured effects ... |
 |
... like a windy sky. The colours become more blended during this process. |
 |
If the wax colour is too dark ... |
 |
... simply add more of the light colours (especially white) to the iron face ... |
 |
... and apply these over the existing colours. |
 |
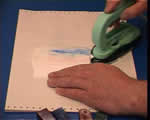
Work the wax into your desired texture - texture is visual noise, and the more of it you get the stormier the sky will look. |
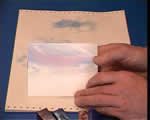 |
So here is a finished sky area. |
 |
To add the landscape you need to use  |
 |
and  which are applied as shown (if you are right handed).
 |
 |
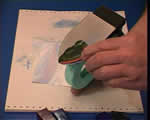
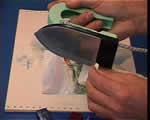
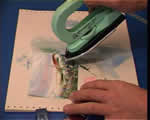
Place the waxed area of the iron onto the card cutting in over the lower area of the existing sky so that no blank card is left exposed. |
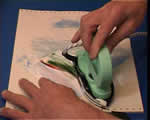 |
Move the iron over to the other edge of the card and watch to ensure that the new wax colours form a horizon line that is clean and clear right across the card. |
 |
It should look something like this. If you have any questions about this landscape part take a look at the basic application of landscape |
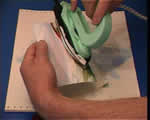 |
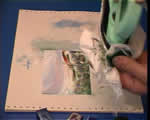
Now dab in some initial foreground ... |
 |
.. until you are happy with the way it is shaping up. |
 |
Add some harmonic colours - these should reflect the colours used in the
sky, so in this image use 
 . Apply a little of each together to the iron ...
 |
 |
... then dab these into the foreground ... |
 |
... until a pleasing harmonic effect is achieved. |
 |
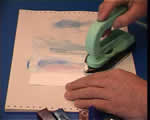
Use the sliding edge of the iron to add the grass details |
 |
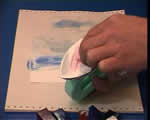
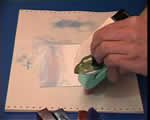
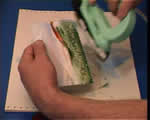
Before you add the bird take time to clean the iron with some disposable tissue. |
 |
Remember to fold a piece into a narrow strip ... |
 |
... then run it along inside the groove at the square back edge of the iron's baseplate. |
 |
Do this also when you have left the iron standing, because this is where any wax from inside the iron will drain to and collect. |
 |
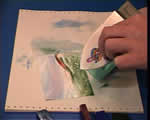
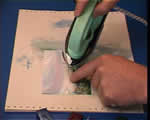
Now to add the bird. Touch the iron's tip into a darker wax colour - maybe
a little each of the
and the |
 |
...then make a spot in the sky area, clean off the iron's tip again, then replace it on the spot and flick out once to the right, lift off, back to the spot and flick out once to the left. |
 |
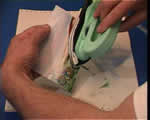
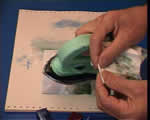
For flowers dip the heated iron's tip into the |
 |
... then dab this in a random manner into the foreground. Try to create a variety of sized and erratically shaped blobs - this makes for a more natural appearance. |
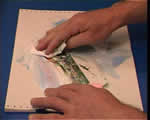 |
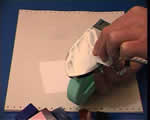
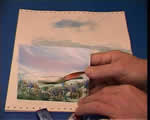
Finally polish the wax surface gently using a folded tissue pad. |
 |
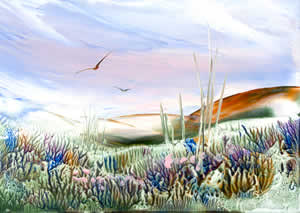
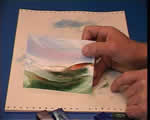
The finished encaustic art wax and iron formed landscape. |
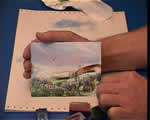
... and here is a live demo of a landscape and sky painted with the iron. If you can master the skills in this image then you will have a good grip on handling the iron as a creative tool. |
| GO TO |
|