


DEVELOPMENT
ONLINE
PROJECTS
|
|
|
|
|
DEVELOPMENT |
ONLINE
PROJECTS |
|||||
| Simple Landscape : First steps in controlling iron effects ... | |
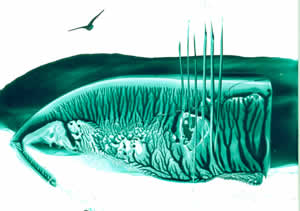 |
The structure of a very simple landscape consists of three bands:
This easy to recreate image involves combining the four basic iron effects to achieve a first result. |
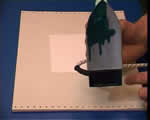 |
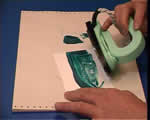
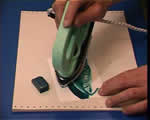
Melt wax onto the iron - remember that the blue green wax will enable you to test the iron's temperature before you begin. |
 |
Load the iron as shown if you are right handed, using the |
 |
Spread the wax over the middle of an A6 card in one go by trailing the iron centrally across from left to right . Don't fiddle about but just do this in one focused move. |
 |
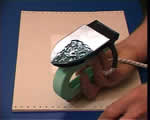
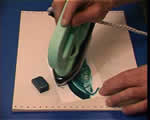
Now place the iron flat down over the lower half of this newly applied wax, then lift it up at a reasonable speed, as if opening a box. You should get a great foliage style effect appearing. If not then repeat but lift off faster. If it still looks weak then add a bit more wax onto the face of the iron and try again. |
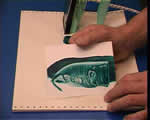 |
You should end up with an affect that resembles this one. |
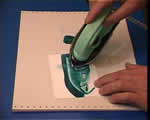 |
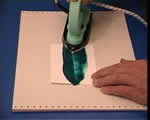
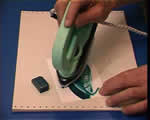
Turn the iron onto its edge by tipping the handle towards your free hand at an angle of about 45 degrees. Then slide the iron carefully forward, rather like an ice skate cutting through the ice surface as it moves. The edge will remelt any wax that it contacts and create a thin and controlled line. Practice will reward you with much better control. |
 |
Be careful not to push down on the iron so hard that it slides sideways instead of forwards. If this happens then the "snow-plough" effect will create broad marks that no longer resemble the grasses required. |
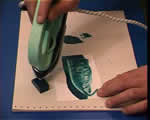 |
The tip of the iron can be gently rested into the wax block colour so that it becomes coated with wax. |
 |
Place the tip on the card with a firm and definite action so that a spot of the wax colour gets knocked off onto the card surface. Flick the wax out towards the right, then place the tip back on the center and repeat by flicking out to the left. |
 |
These actions should produce a simple bird that has fine and sharp tips to its wings. If it looks wobbly then you are working too slowly and trying to draw the wings too carefully - go for a quick flick action at this stage.
|
 |
If you end up with big blobby birds take a look at the common faults page for some clarification and tips. |
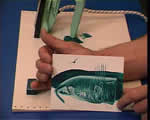 |
Finally we got to the image desired. It shows the 3 band structure of Light, Distance, Foreground and introduces the usefulness of the 4 main iron effects and techniques that will be developed as your skills progress. |
| GO TO |
|