


DEVELOPMENT
ONLINE
PROJECTS
|
|
|
|
|
DEVELOPMENT |
ONLINE
PROJECTS |
|||||
| Sign your encaustic art work using the scribing tool ... | |
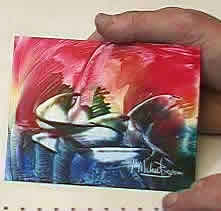 |
Signing your work is the way that you display your completion of the piece and putting your name to something is always a good test for your own discernment. If you are really not happy with something then don't sign it. When you sign you acknowledge the work as yours and as worthy of being signed. We tend to be judged by both our best and our worst, so take care in what you sign. |
 |
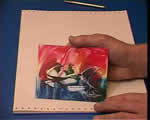
It is normal to sign at the bottom of an image, but leave enough room for a mount to overlap the artwork - if you sign too close to the edge your name could be cut in half when the work is finally mounted or framed.
|
 |
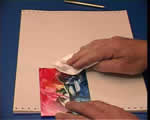
If the area where you wish to sign is rather indistinct, then you may need to smooth over it - here the micro tip is being used in the Stylus tool. |
 |
You could also add some slightly darker colour if you want the signature to show up more strongly. |
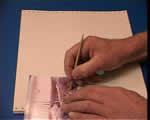 |
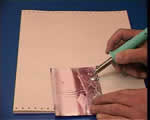
Once the background is OK pick up the scribing tool and using the pointed end begin to sign your name into the wax. |
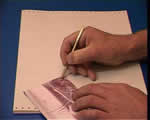 |
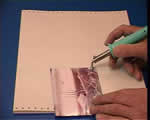
As you progress small fragments of wax colours will be displaced and you may need to have a small piece of tissue to hand so that you can wipe the scriber tip clean and brush excess shards off the artwork - beware, because these little pieces can get everywhere! |
 |
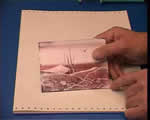
It is often useful to have an old mount handy and place that over the artwork as though it were in a frame, then you can see exactly where to sign so that the signature is visible and nicely positioned. |
 |
Working into darker areas of colour makes it easier to see the final signature. Use the scribing tool carefully but press firmly and clean the tip with tissue as soon as it has any way sticking to it. |
 |
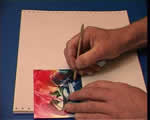
Also be aware that the thicker the wax the more careful you need to be. Attacking a heavily waxed area can result in more wax breaking off than you bargained for, so sometimes you might need to work through the wax a couple of times to get through to the card underneath. |
 |
Carefully brush off the shards of wax using a tissue. Look out for tiny pieces that can get lodged in the tissue, because if you then polish the final card with this you might find streaks of that colour all over the artwork - be vigilant for these tiny coloured fragments! |
 |
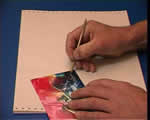
So your artwork is signed and the work is done. The piece is complete. Time for a rest or a new start. |
| GO TO |
|