


DEVELOPMENT
ONLINE
PROJECTS
|
|
|
|
|
DEVELOPMENT |
ONLINE
PROJECTS |
|||||
| Black Marker Edging : add a sharp edge to your art work ... | ||
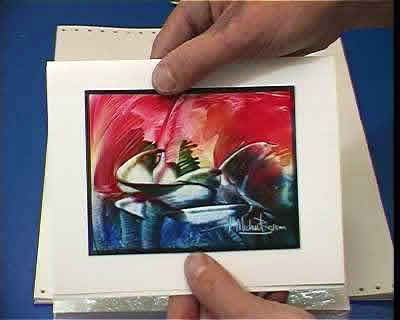 |
Even the simple act of putting a defining black edge around your artwork can make a great difference to the presentation, power and professionalism of the final piece
First impressions are the ones that last, so the initial impact of your presented artwork is important to how well art is received by it's viewers. |
|
 |
Black lining can be done on the fly, as you produce each image, or at a later time, when there are a collection to be looked through and presented. I am using a Black PAPERMATE Permanent Marker with a chisel point. |
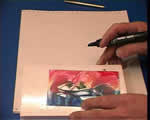 |
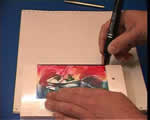
Make your work area clean and tidy, then find a block with a straight edge that is longer than the artwork you are going to finish. Here I just used an unopened pack of encaustic art painting card that is one size larger than the A6 artwork. Any solid deep edge is OK but it will get dirty, so don't use anything that you want kept perfectly clean. |
 |
The point of the marker pen is wider in one direction than the other. First you must decide how wide the black line edging is going to be, then keep to this orientation of the marker pen in your hand for the whole of this same artwork piece. |
 |
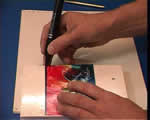
Start by lining up the edge of the artwork with the edge of the block underneath. The touch your finger against the back side of the wet black tip (sorry but you do get a black spot on your finger), then place the tip onto the top corner of your artwork with finger still in place, and rest the finger against the edge of the block, ready to run it down the length of the card and thus black line the artwork perfectly. |
 |
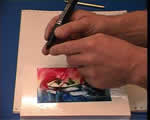
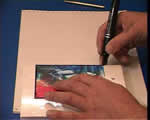
As you move down the card keep a slow smooth flow of movement and go right off the end of the artwork. It should look like this - nice and neat, straight and black. If it is not dark enough then go over it again, just repeating the same process. |
 |
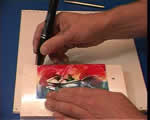
For the next edge, rotate the card and realign the artwork, then with finger in place, start your movement down the block edge, leaving the black line behind on the artwork as you go. |
 |
Repeat this for each of the edges, until you have completed the whole exterior of the artwork. NOTE: some people use a ruler for this, but personally I find it quicker and crisper to use the finger technique throughout. |
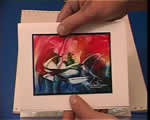 |
Finally, the piece is completed. This technique applies black ink on top of the wax, but the marker can also be used direct onto the card underneath the wax for framed and silhouette results - similar to ink stamping, except that you draw the image instead of stamping on someone elses designs.. |
| GO TO |
|